
Frequently Asked Questions
Everything you need to know about the AEC platform. Ask our AI Assistant or search categories below.
Wallxy User Guide
Get the full offline handbook covering setup, drawing viewers, permissions, and site tools.
General Information
Wallxy is a specialized collaboration and project management platform designed specifically for the AEC (Architecture, Engineering, and Construction) industry. It helps professionals manage drawings, coordinate with teams, and engage with clients all in one secure place.
Wallxy streamlines your workflow by providing premium version control for drawings, live vector rendering, and real-time collaboration tools. Simply create a project, upload your files, and invite your team or clients to get started.
Architects, interior designers, contractors, and project managers who want to reduce errors, improve communication, and have a professional way to present work to clients will find Wallxy incredibly useful.
Unlike general-purpose storage or project management apps, Wallxy is built with AEC workflows in mind, featuring specialized drawing viewers, site-ready QR codes, and industry-specific project organization.
Getting Started & Account Setup
You can sign up using your email address or Google account. Once registered, you will be guided through a quick onboarding process to set up your profile.
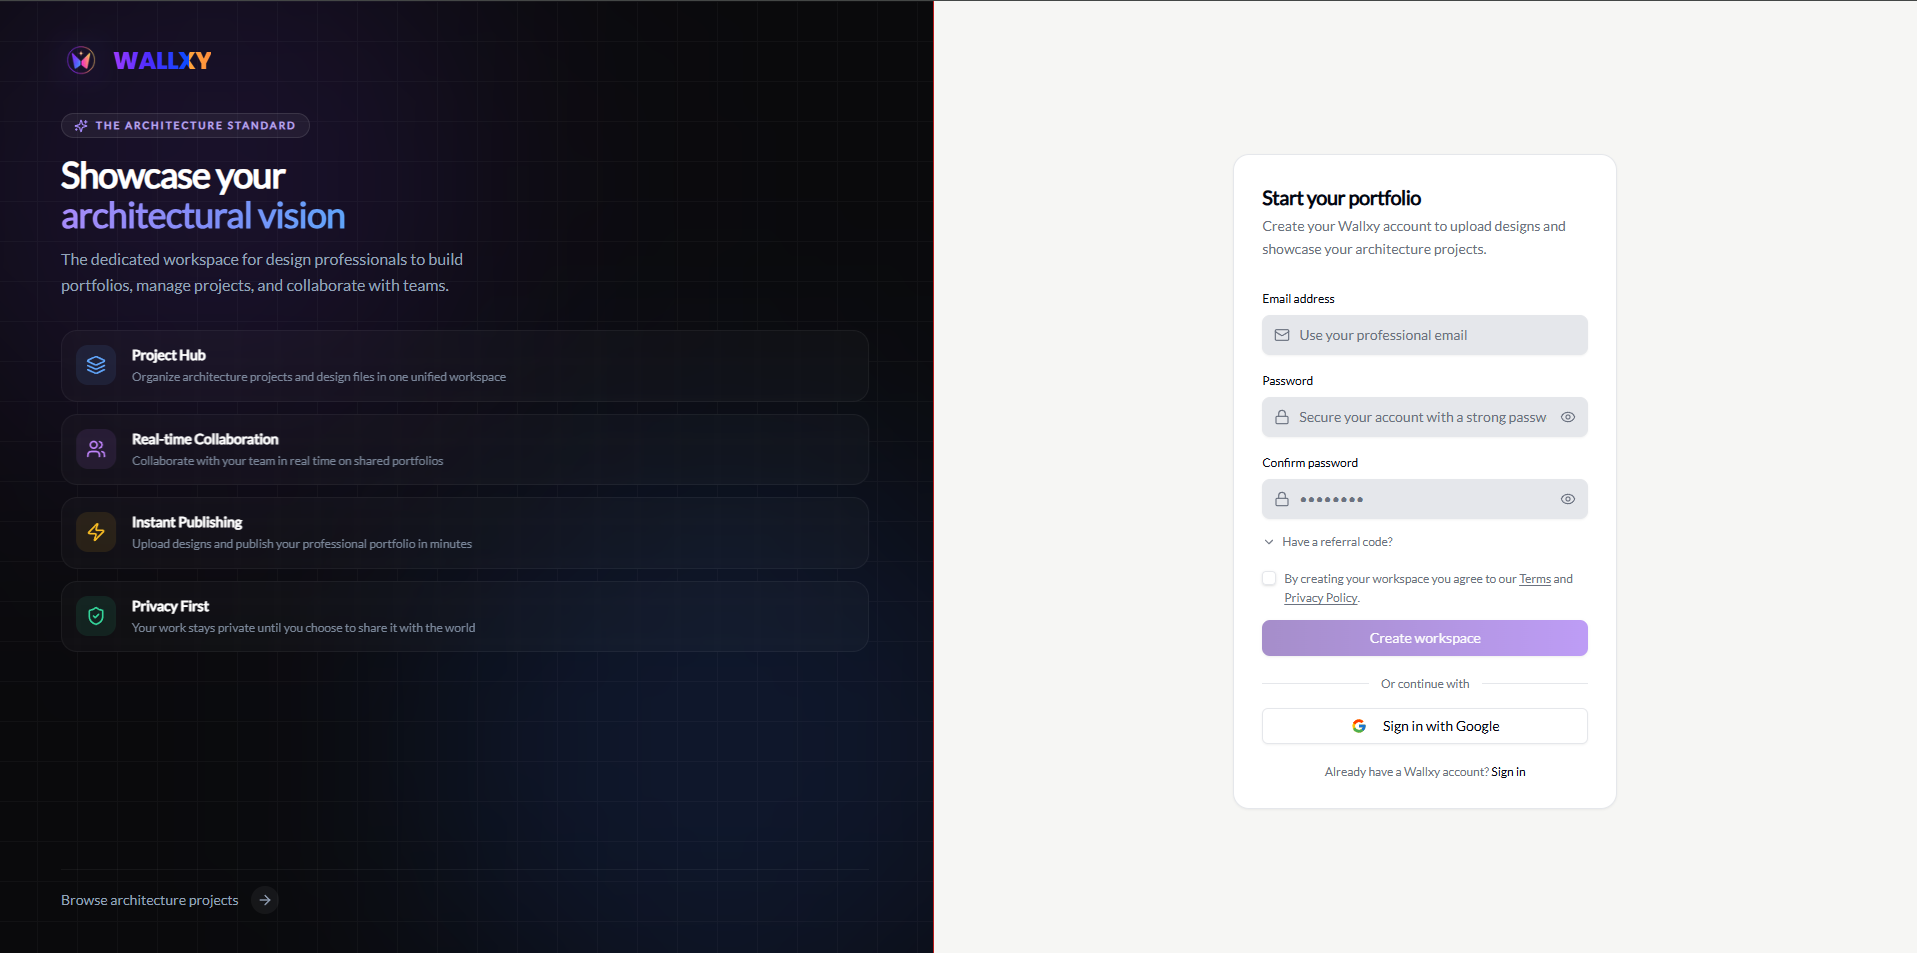
No, Wallxy offers a free tier to get you started. You can upgrade to a Pro plan later for advanced features.
Please check your spam or junk folder. If you still haven't received it, click "Resend Verification Email" on the login page or contact support.
An individual profile is for your personal portfolio, while a Company Workspace allows you to add team members, manage large-scale projects, and collaborate under a single brand identity.
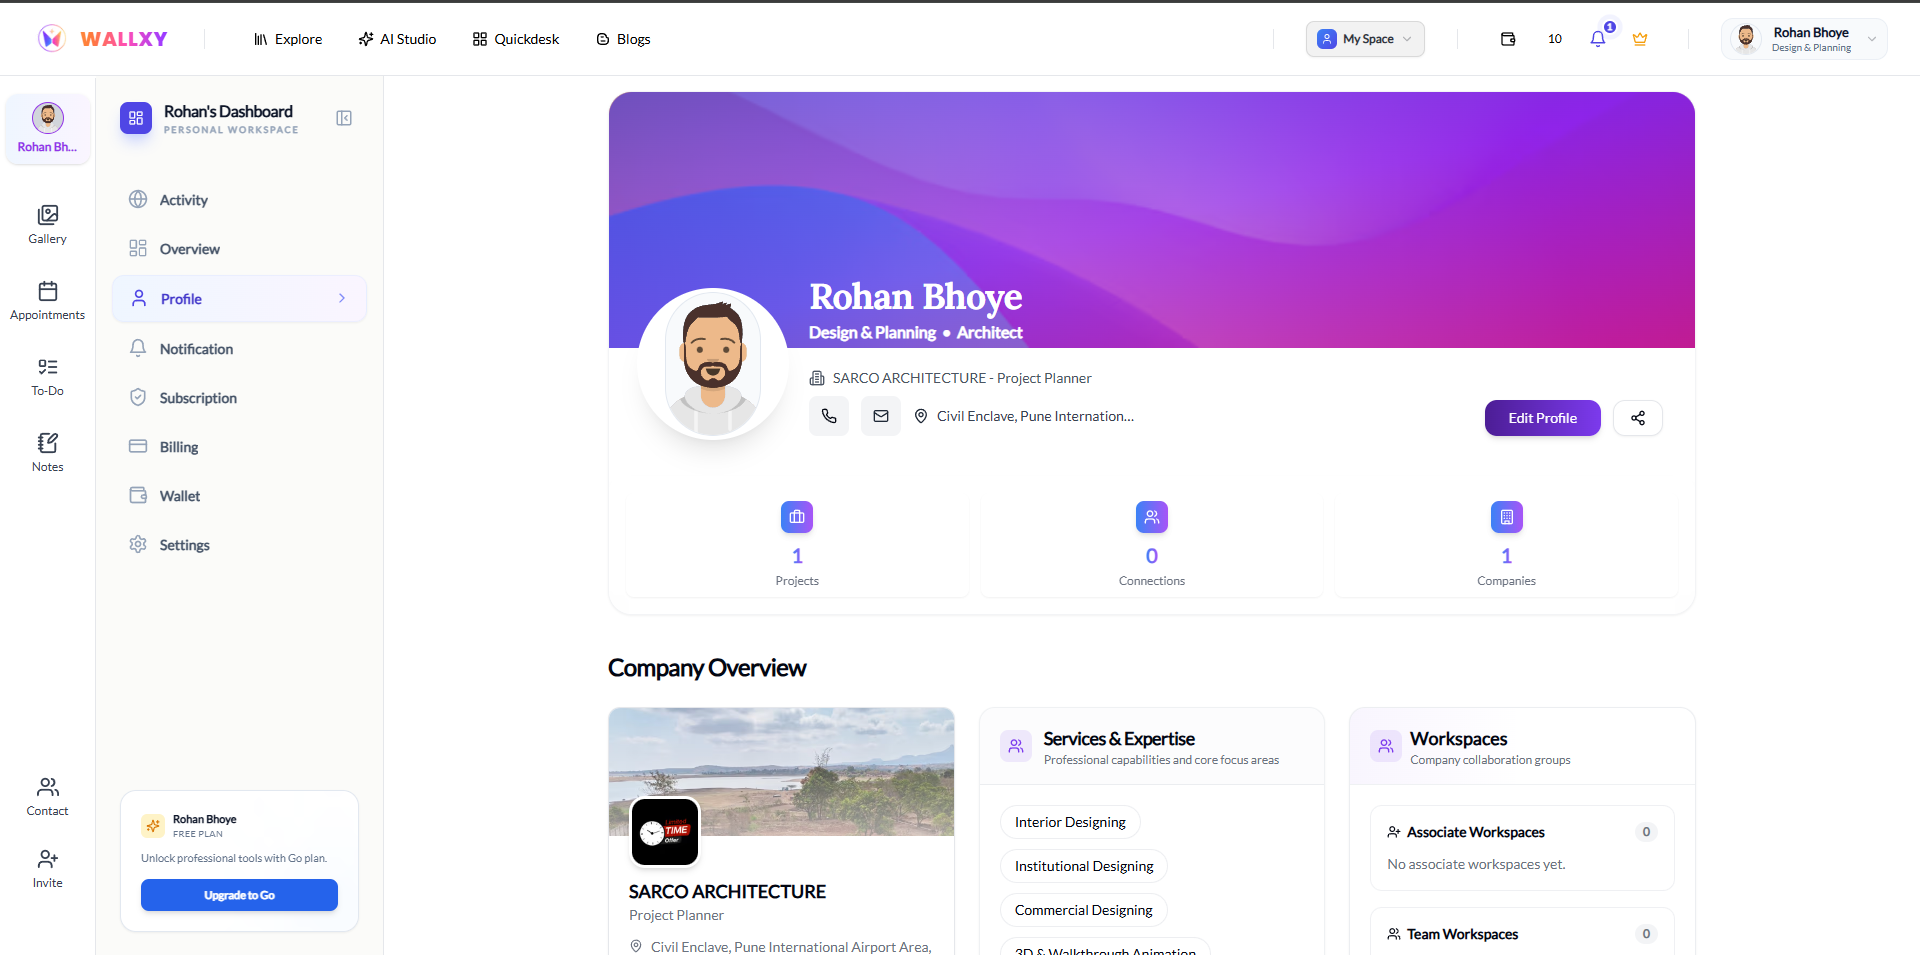
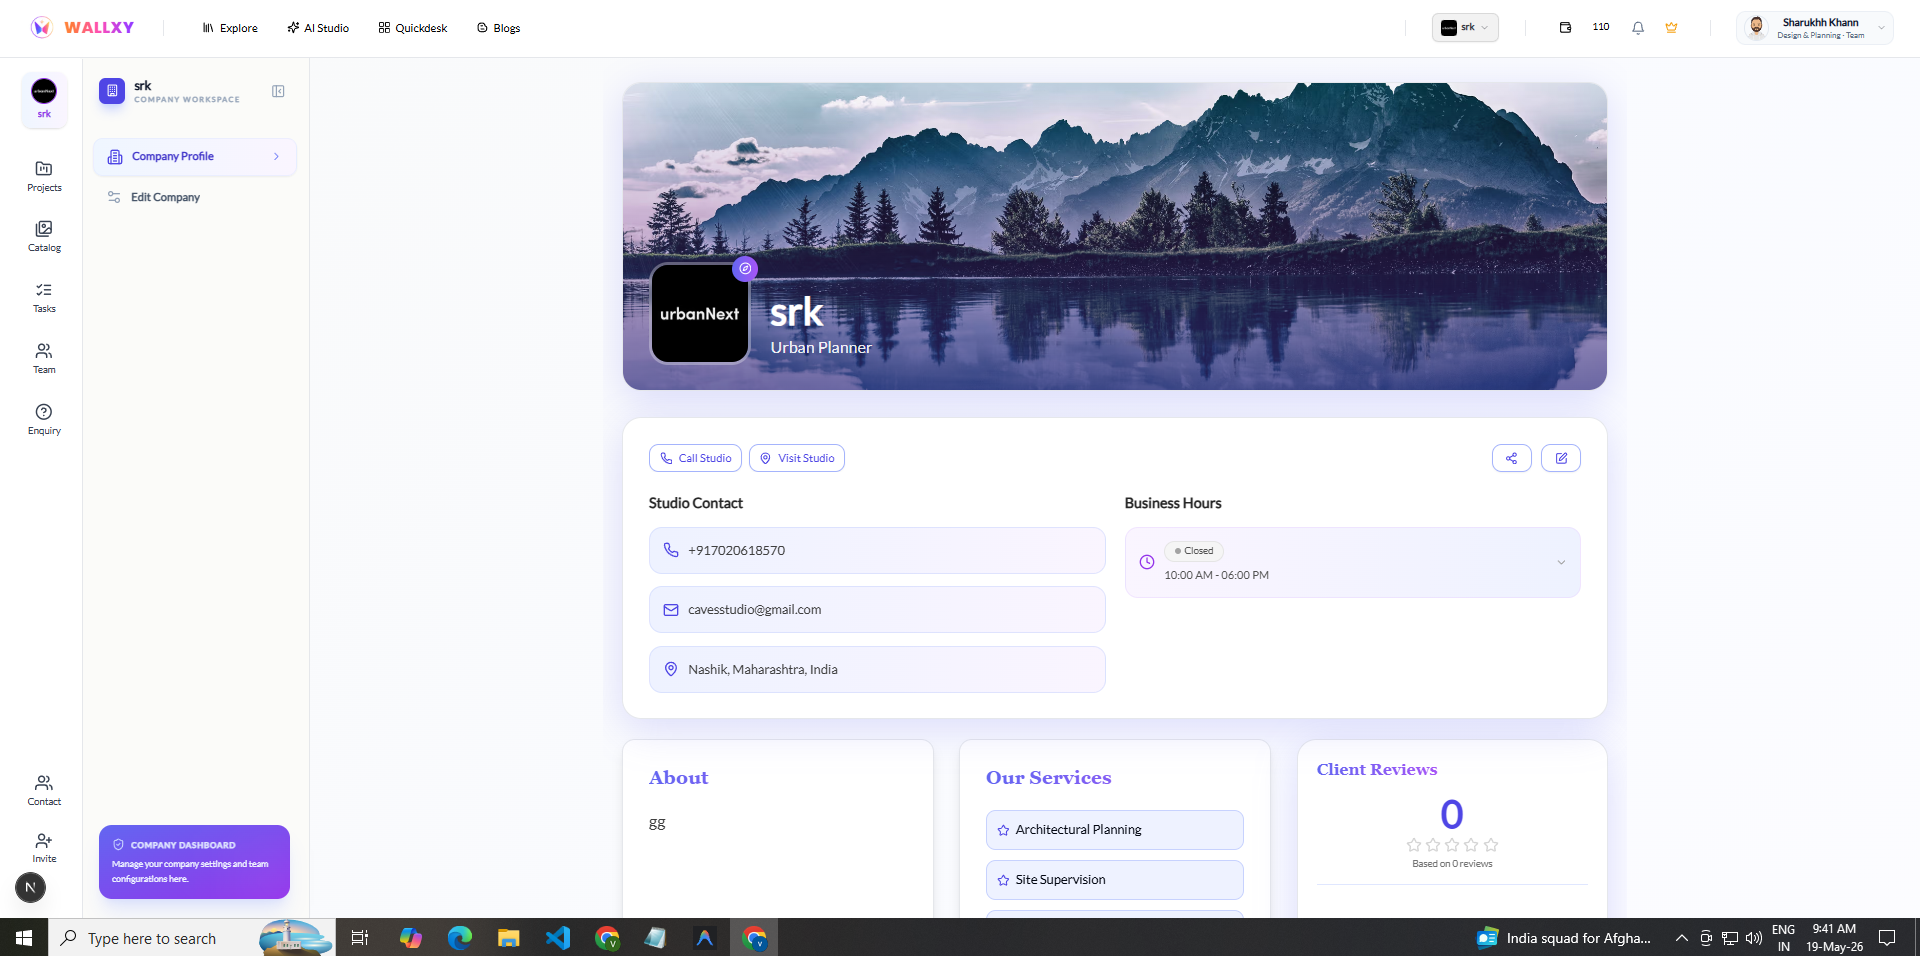
Company Workspace & Profile Setup
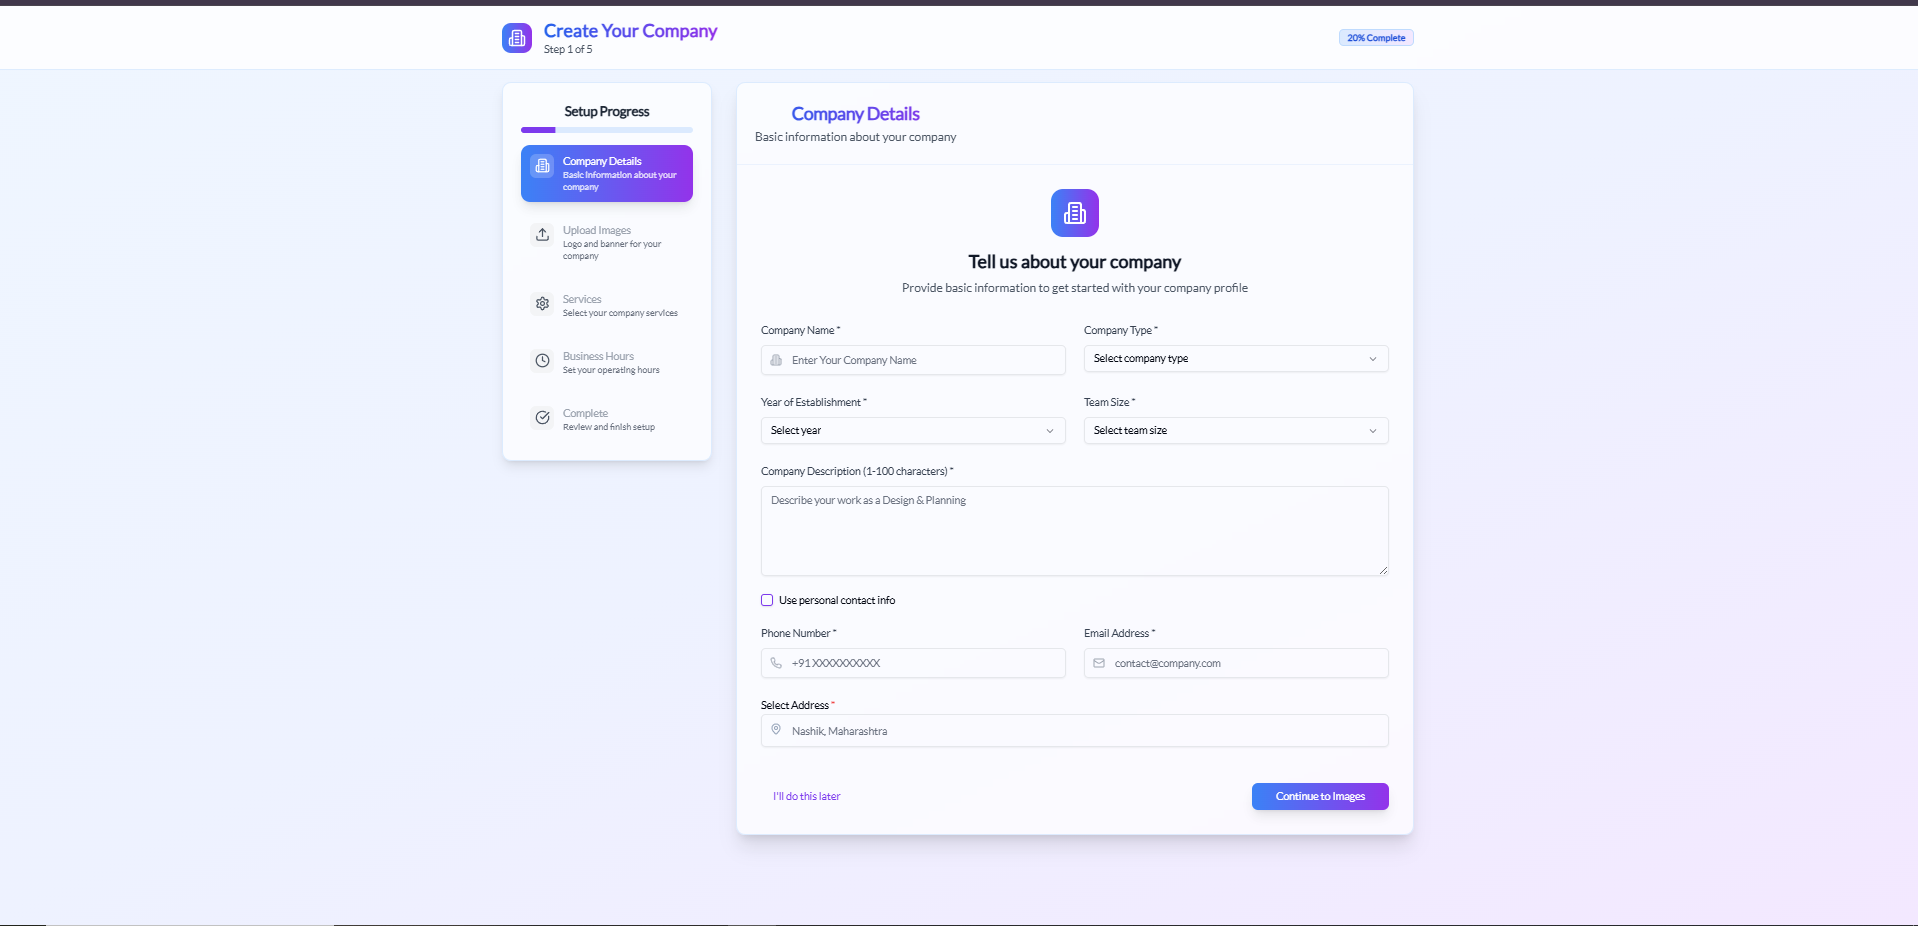
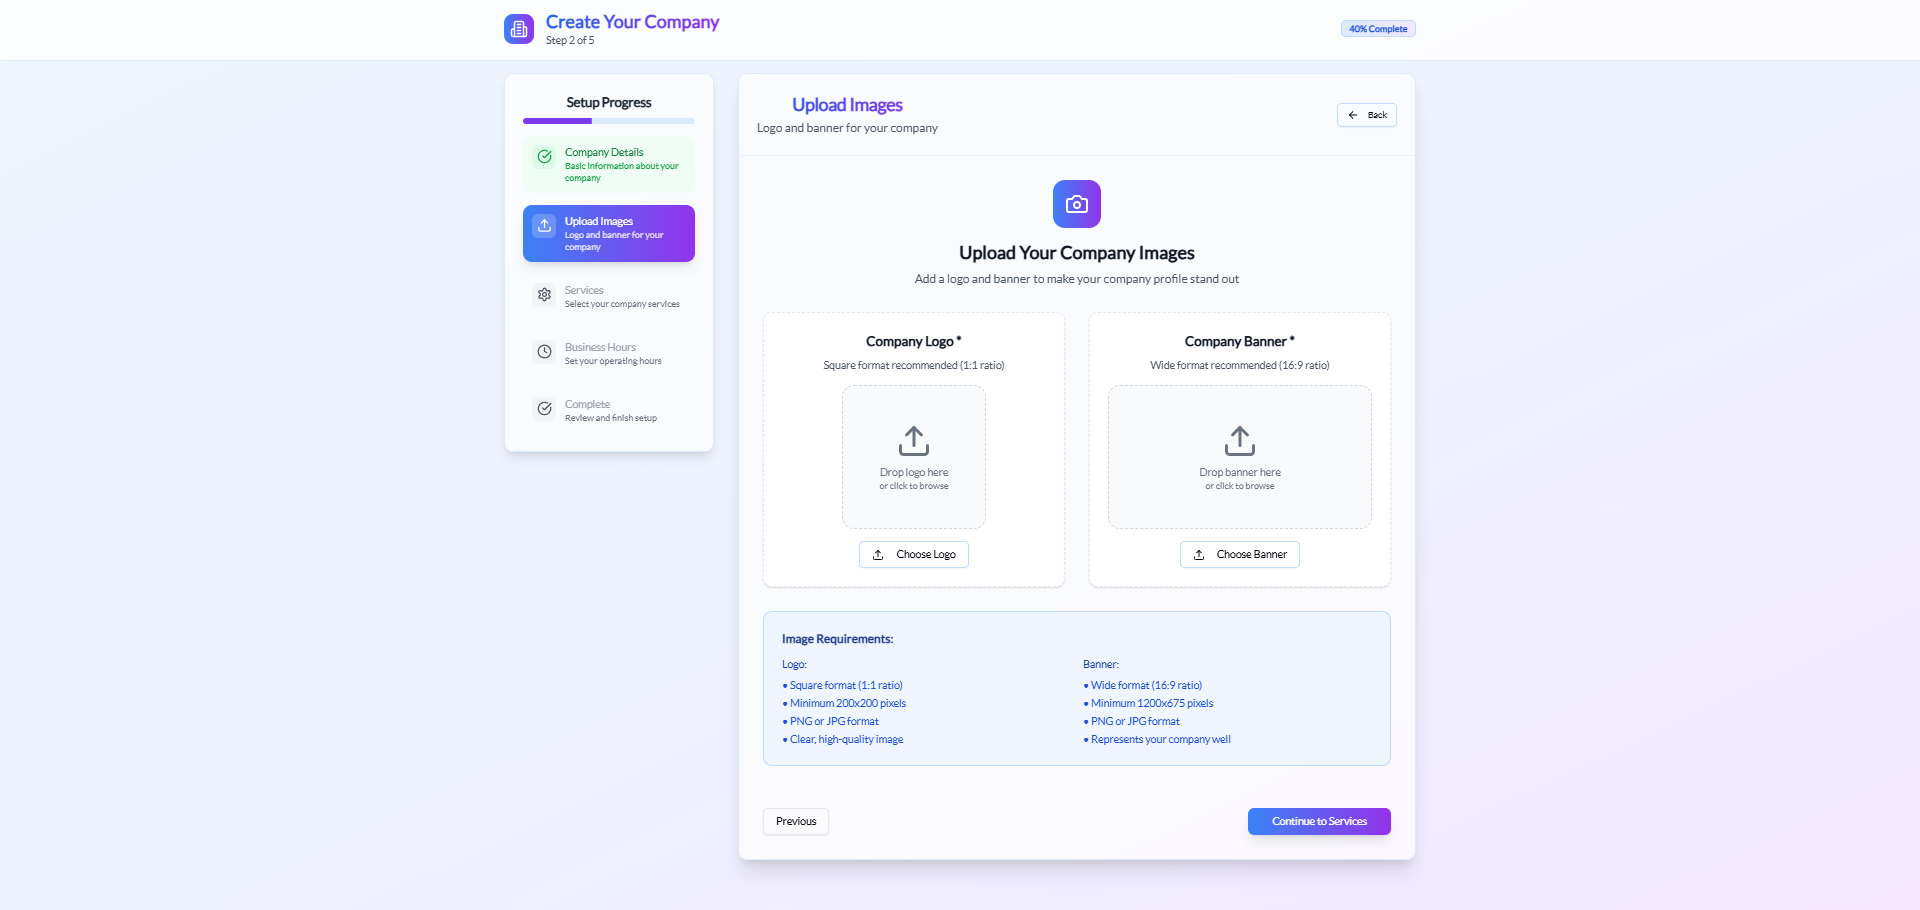
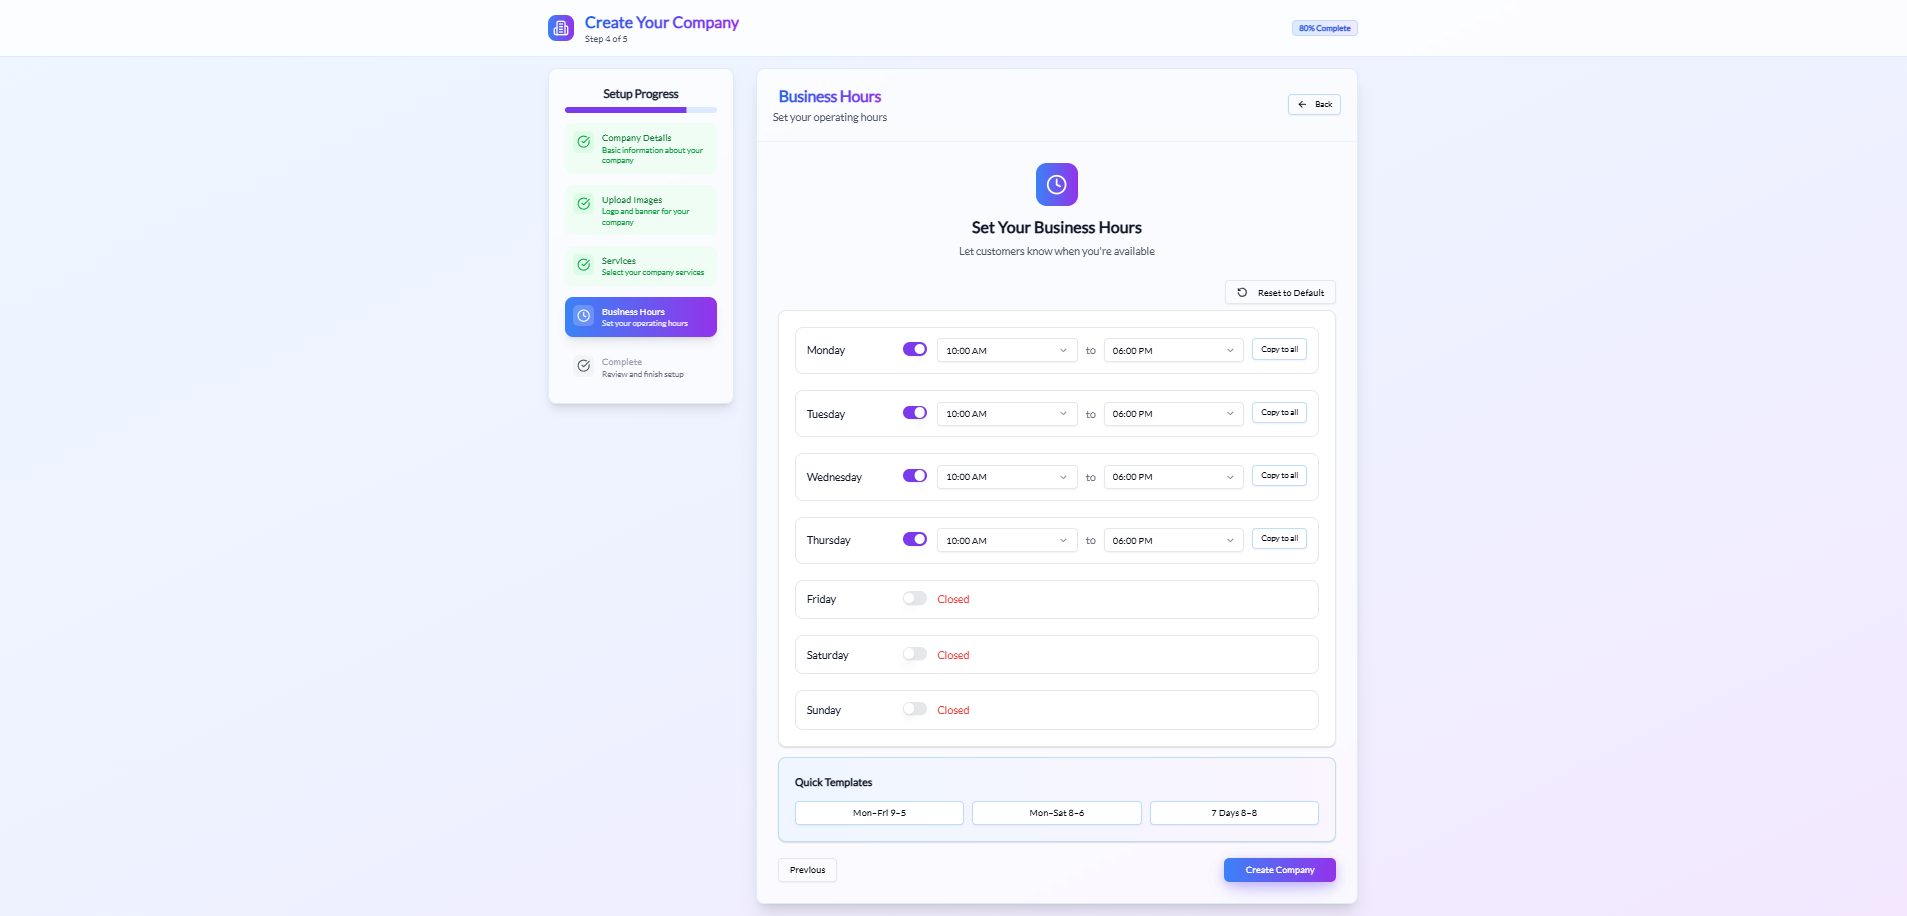
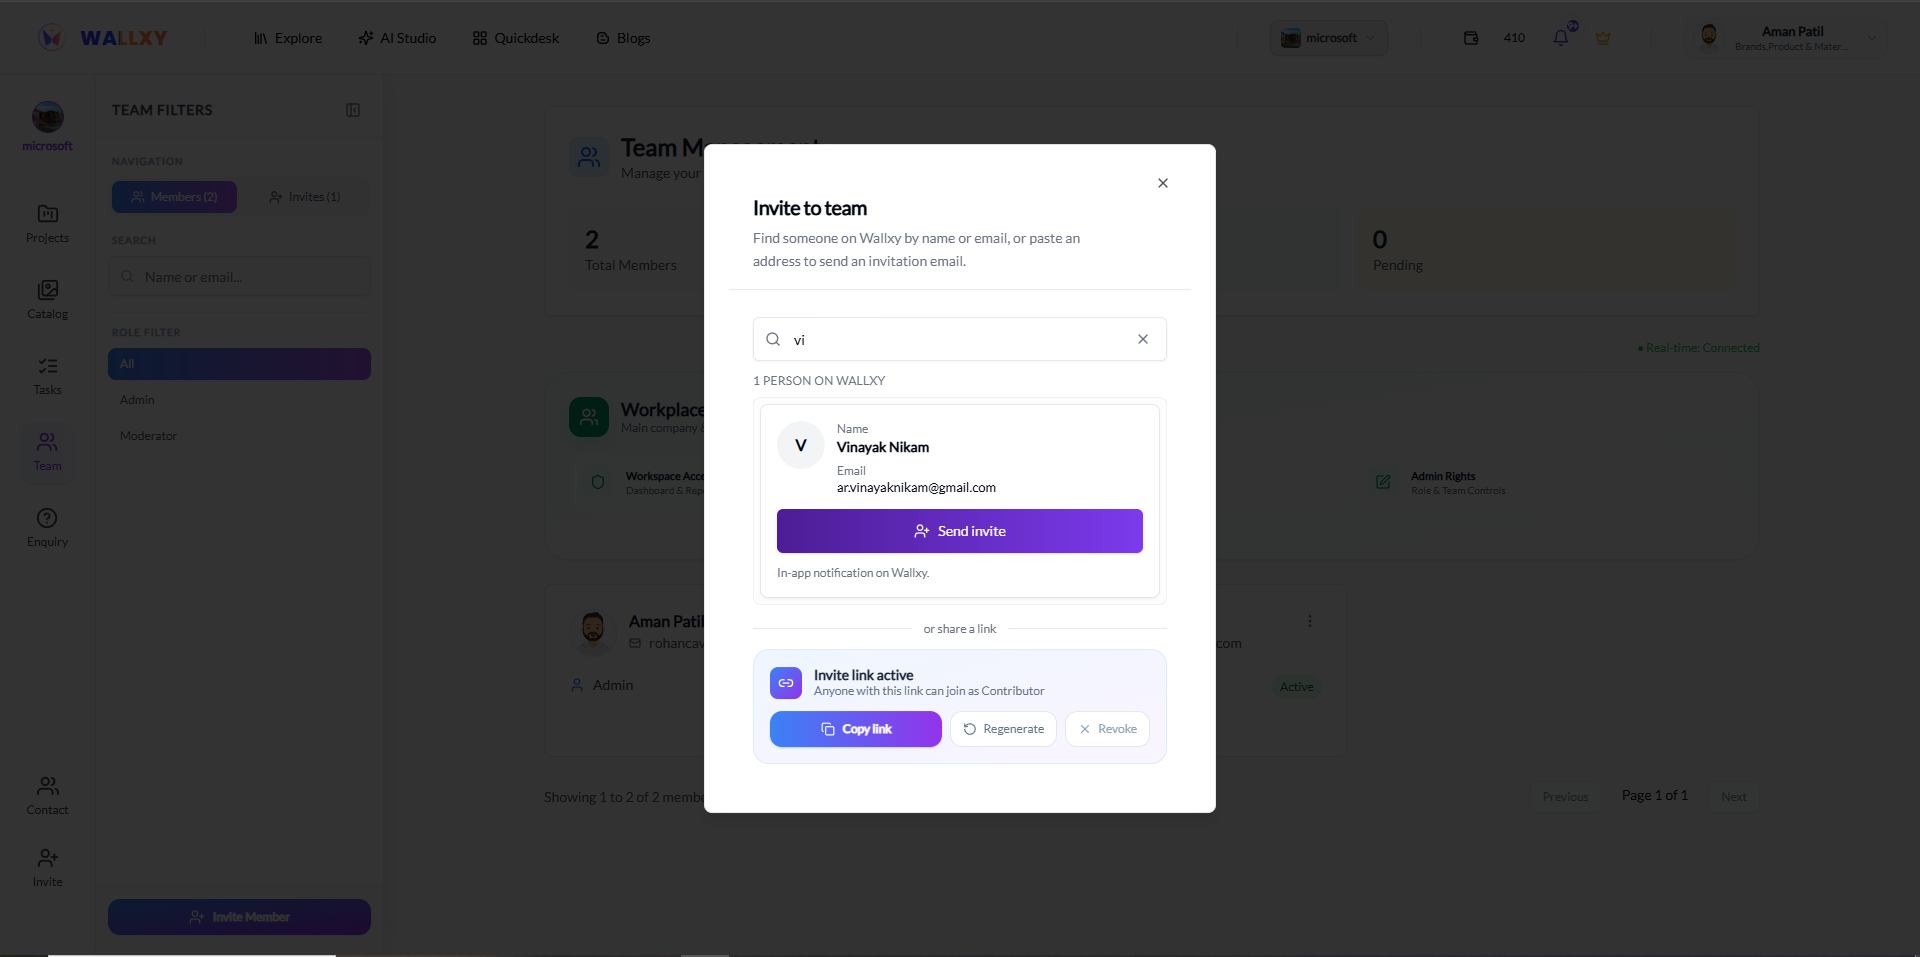
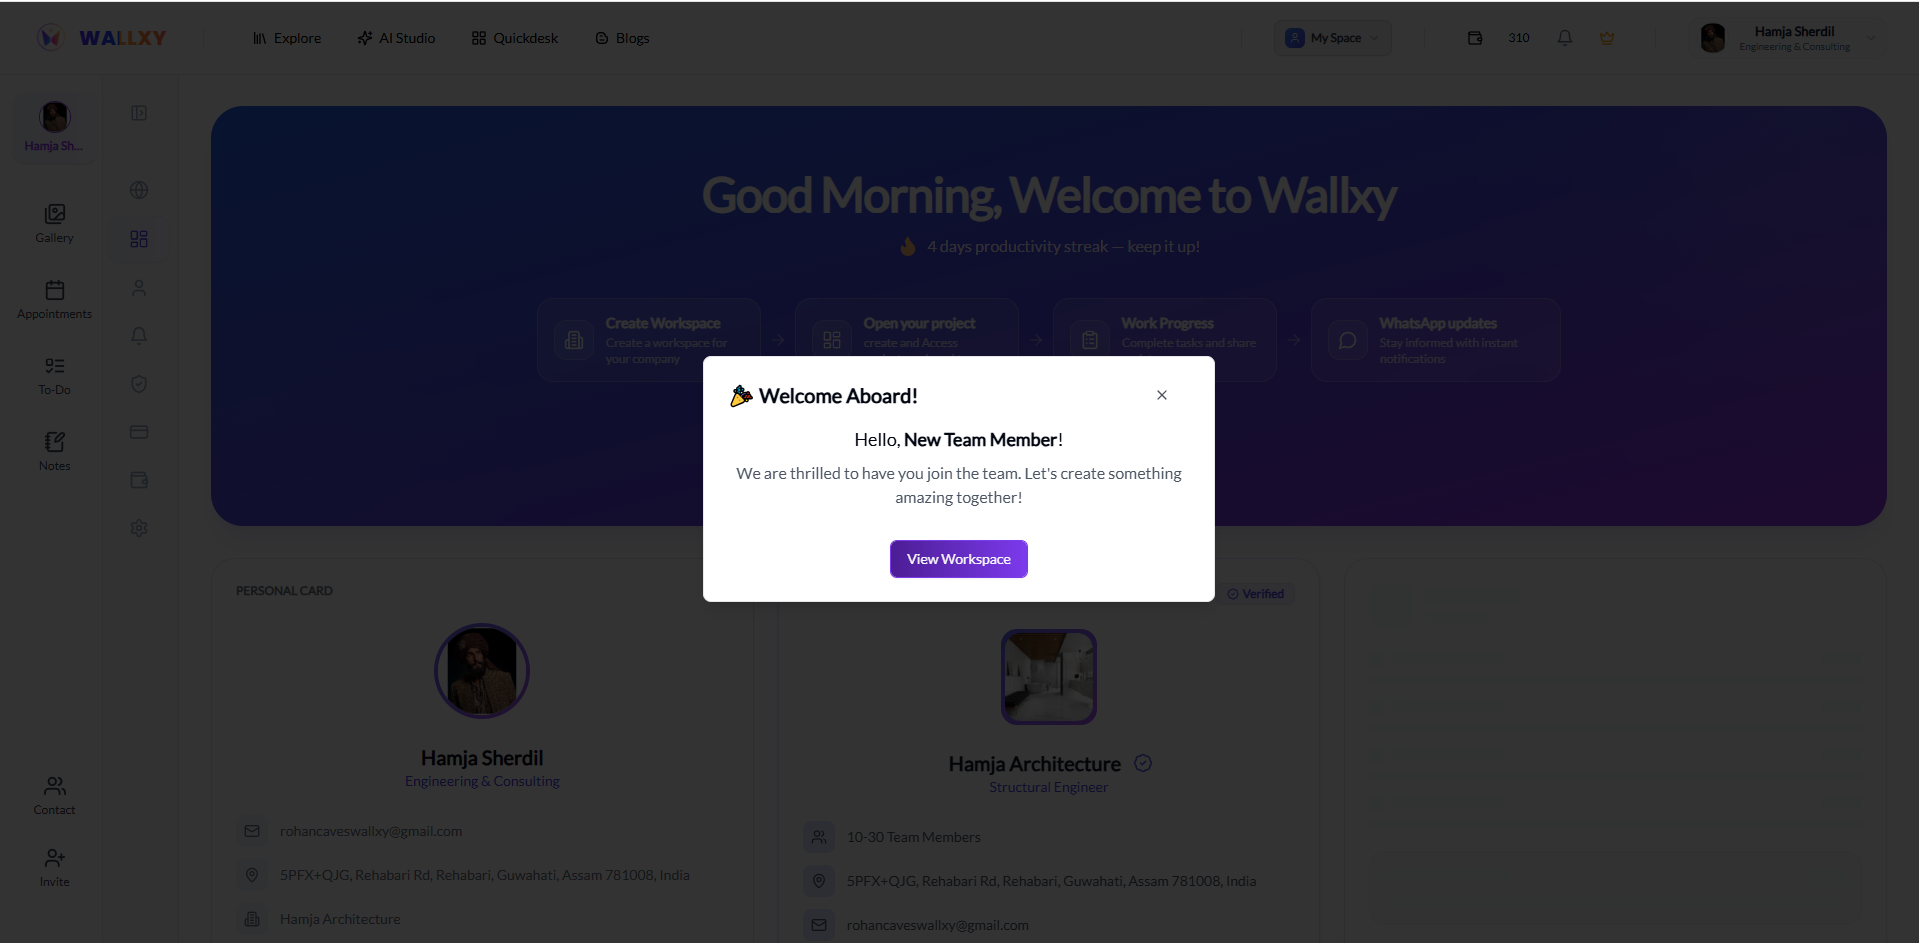
Setting up your Company Workspace is quick and establishes your brand's master environment. Follow this step-by-step flow: 1. Navigate to 'Company': From your main sidebar dashboard, click on the 'Company' menu item. 2. Create Workspace: Enter your brand details including Company Name, Domain/Website, and upload a high-resolution Company Logo for custom branding on sheets and client links. 3. Fill Company Details & Submit: Complete the rest of the company information fields (such as office address, discipline, and contact details) and click the Submit/Save button to finalize your workspace initialization. 4. Invite Team Members: Click on the 'Invite Collaborator' tab, enter their email address, and select their role permission level (Moderator, Contributor, or Viewer) to start collaborating under a single brand identity.
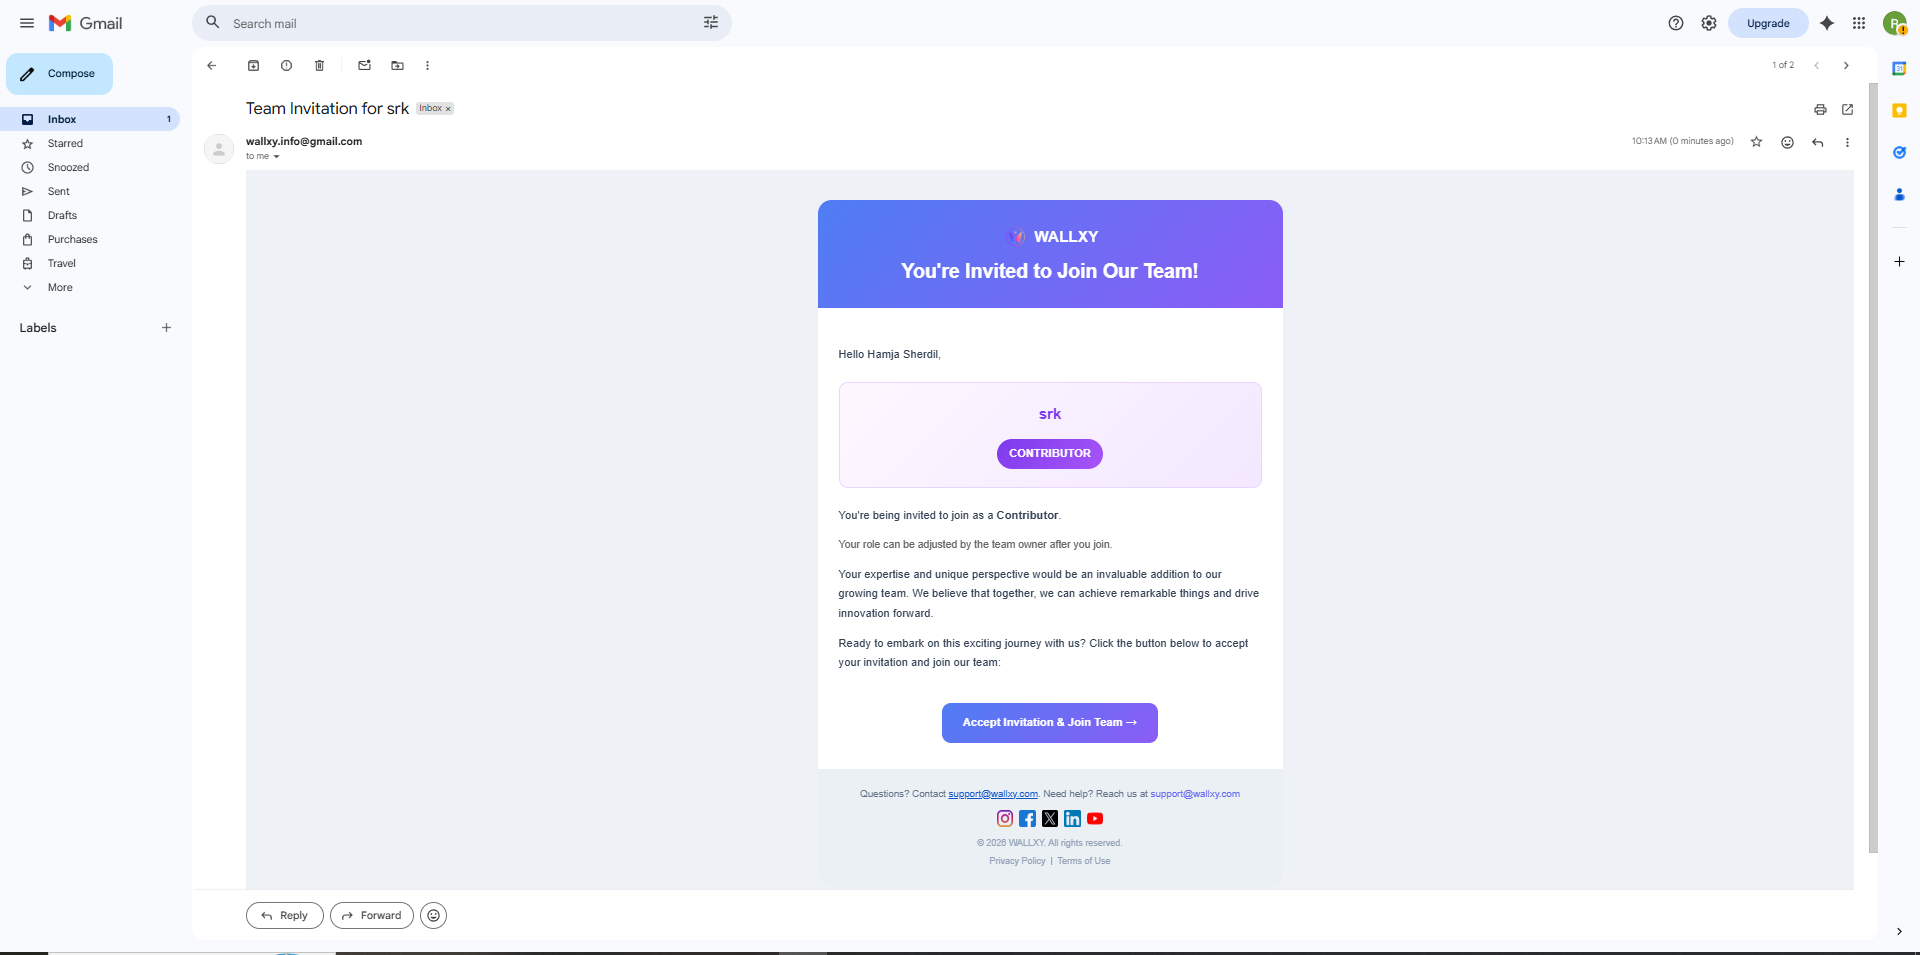
Yes! Joining an existing workspace is the easiest way to connect with your team. Follow this process: 1. Receive Invite Link: Your company administrator will send you a unique invitation link via email or direct chat. 2. Sign Up or Log In: Click the invitation link. If you already have an account, select Log In. Otherwise, select Sign Up to create your new profile. 3. Access Workspace: Once signed in, you will be automatically added to your company's workspace with the role permissions assigned by the administrator.
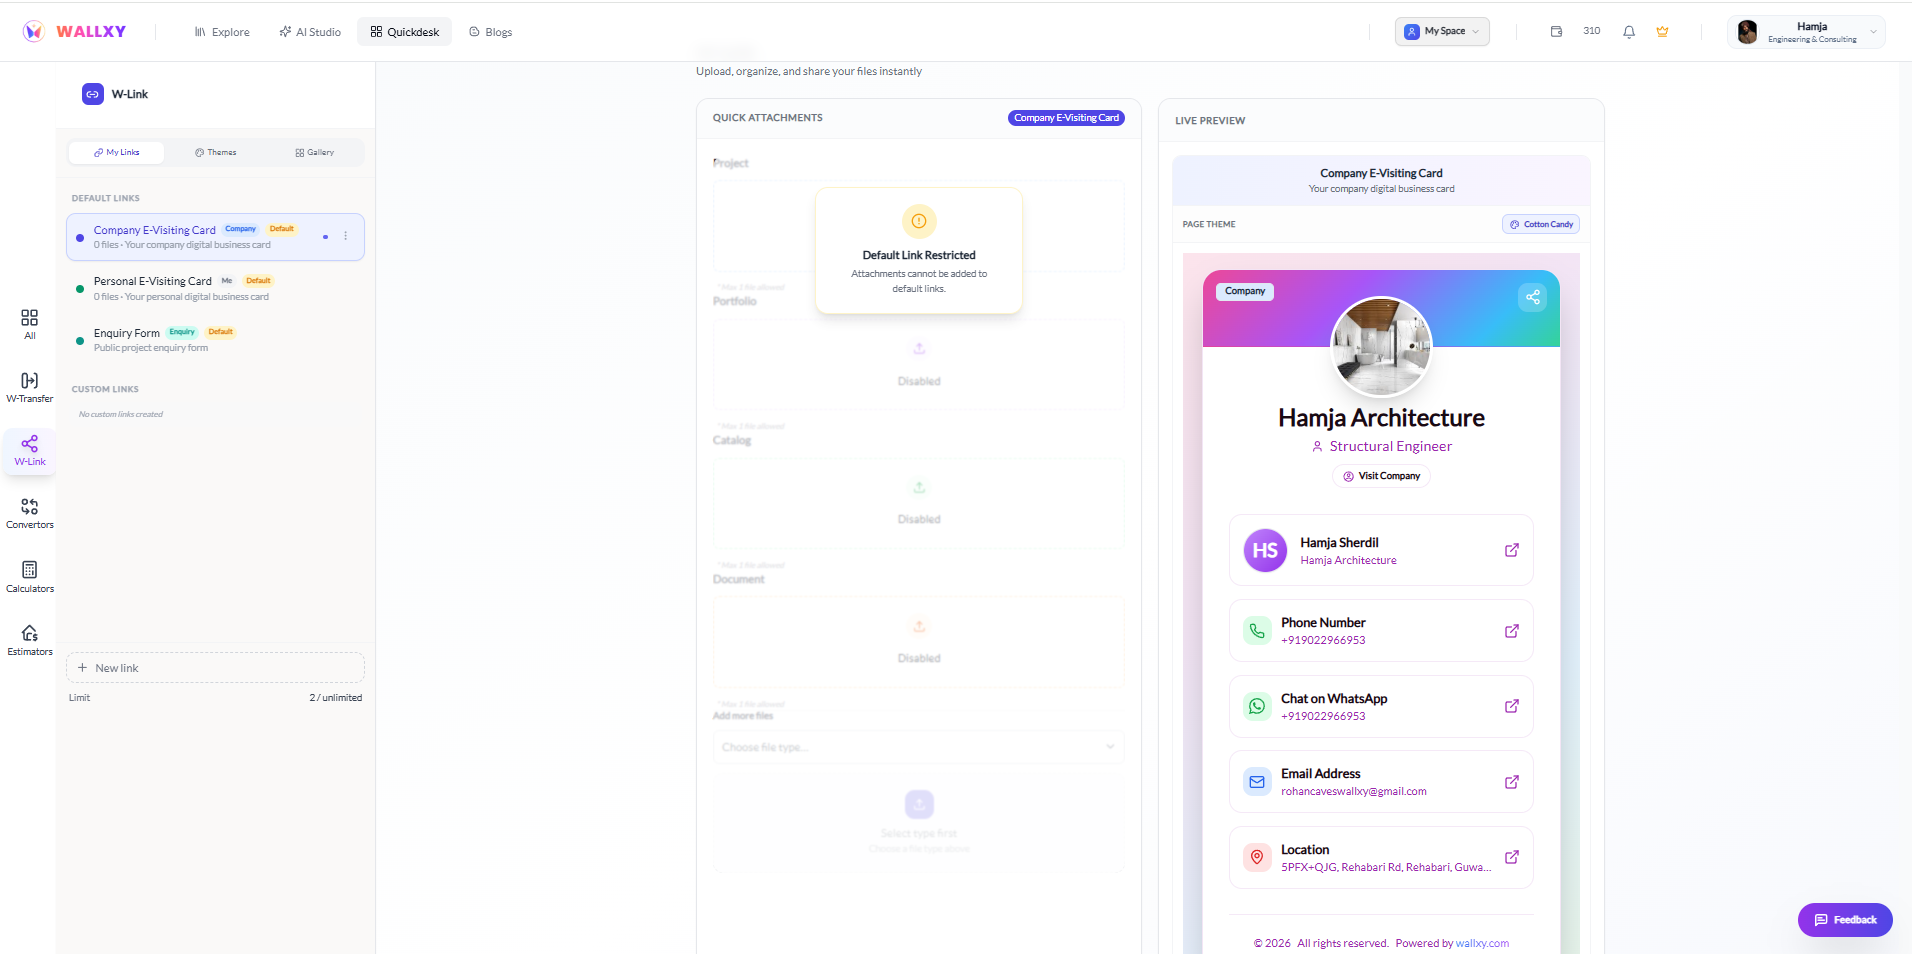
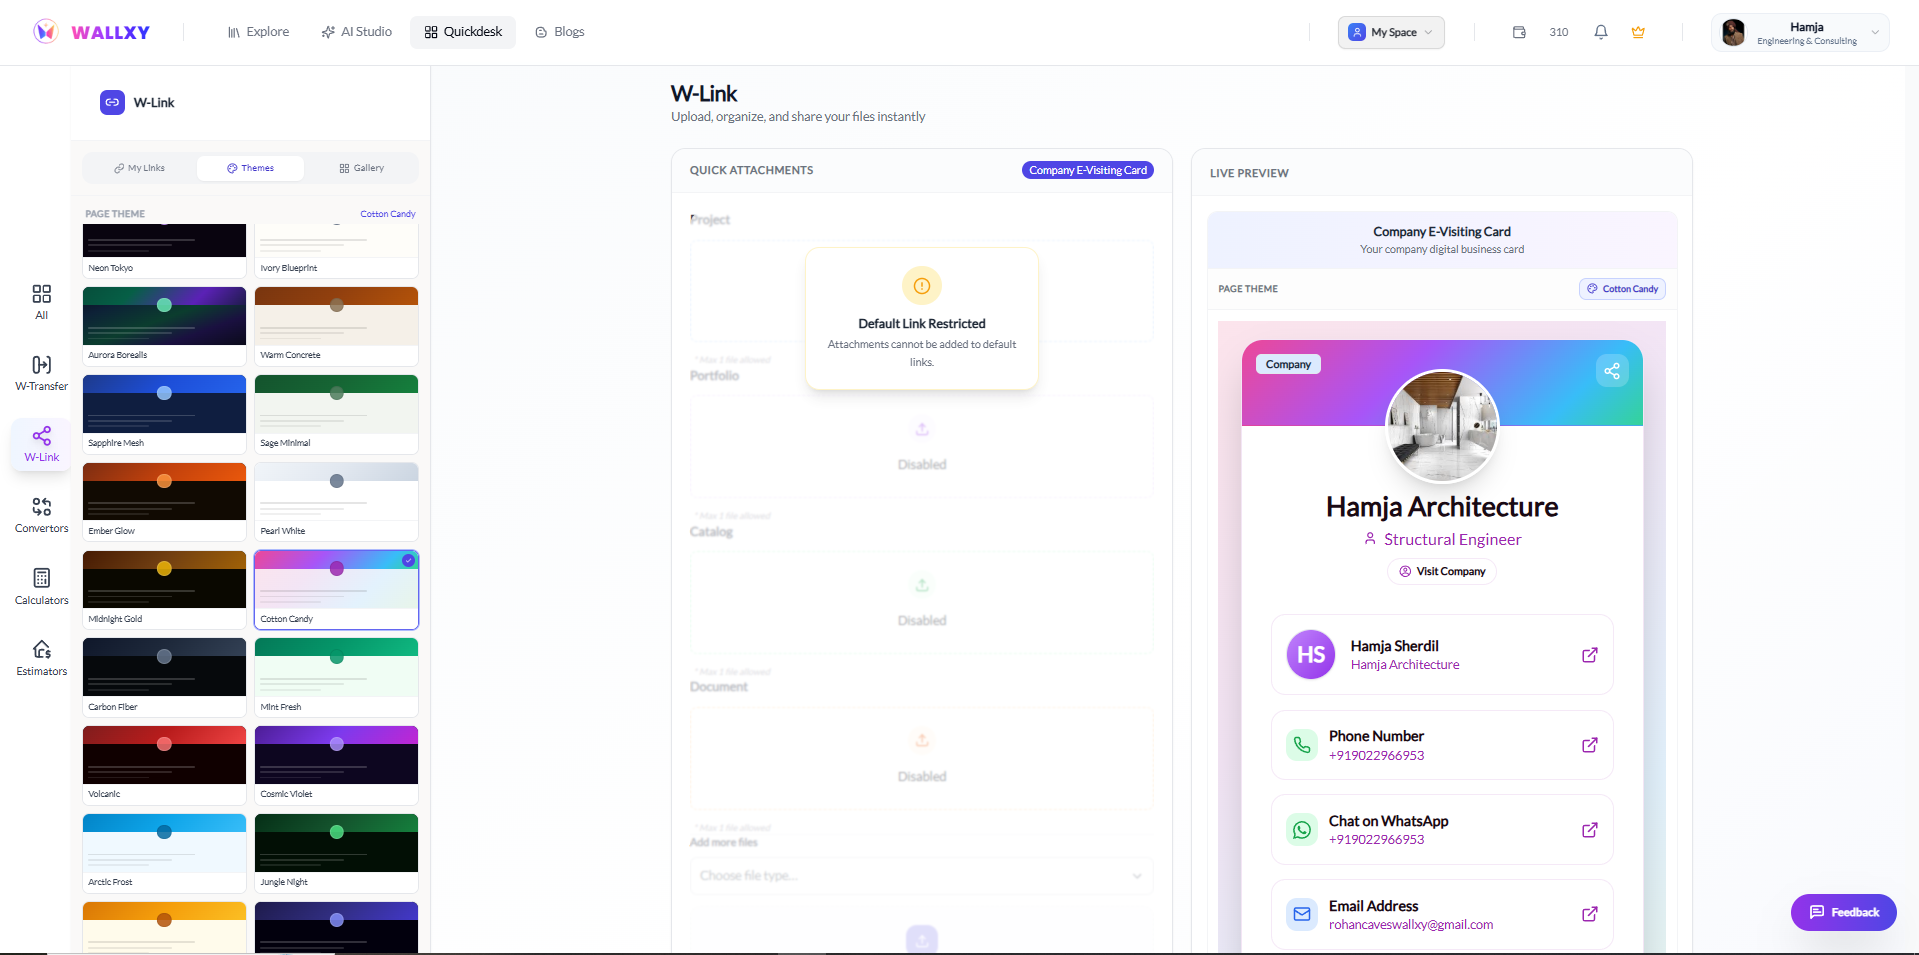
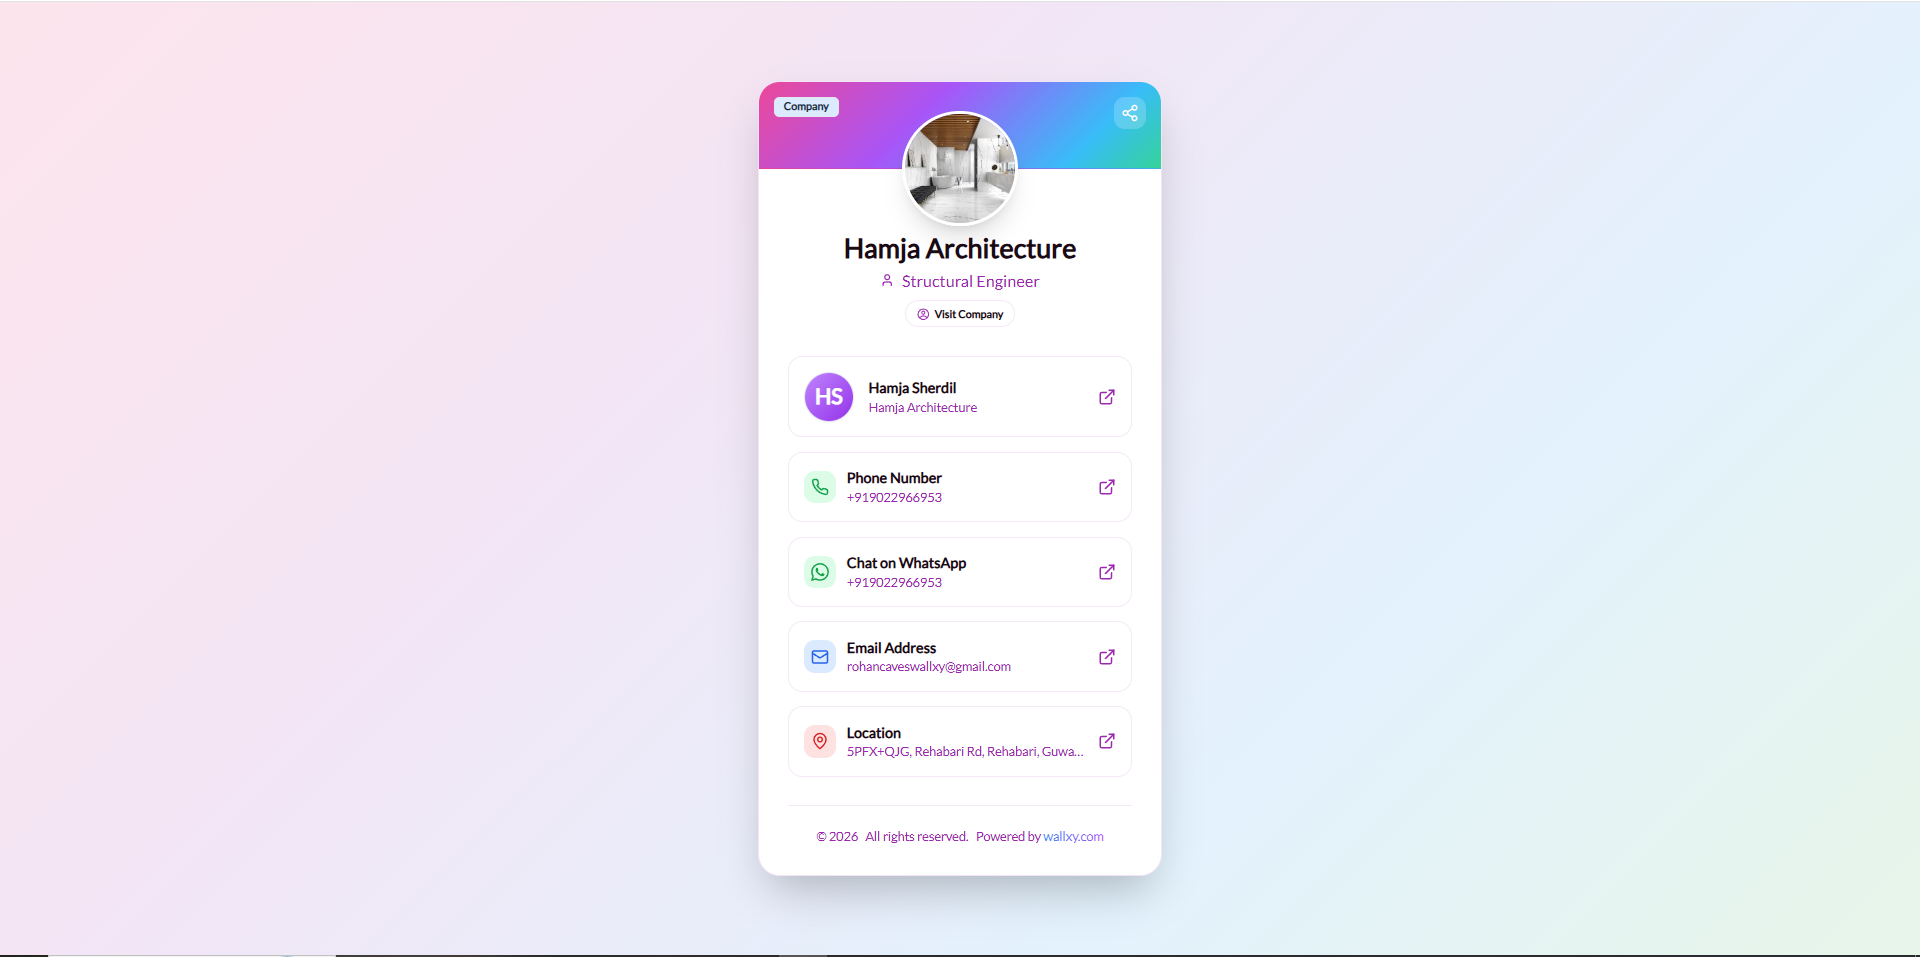
Wallxy's W-Link is a powerful digital business card (VCard/Linktree) customizer built for architects and designers. Follow these steps to set up your custom page: 1. Navigate to W-Link: From your dashboard sidebar, click directly on the purple W-Link icon to open the editor panel. 2. Select & Customize Your Link: Under the My Links tab, choose your target card: • Default Cards (like Company E-Visiting Card & Personal E-Visiting Card) are pre-configured to showcase your direct contact info (Phone, WhatsApp, Email, Location) and profile details. *Note: Quick Attachments cannot be added to default cards.* • Custom Cards (created via the + New Link button on the bottom left) let you upload unlimited external links and attach high-resolution files under Quick Attachments (Project, Portfolio, Catalog, or Documents) to share instantly. 3. Design Custom Themes: Navigate to the Themes tab at the top-left to select your preferred background colors, glassmorphic layout themes, and custom active button designs. 4. Review & Share: Watch the interactive Live Preview mobile viewport rendering on the right update in real-time as you type. Once satisfied, click save to copy your unique, live public link and share your digital business card instantly.
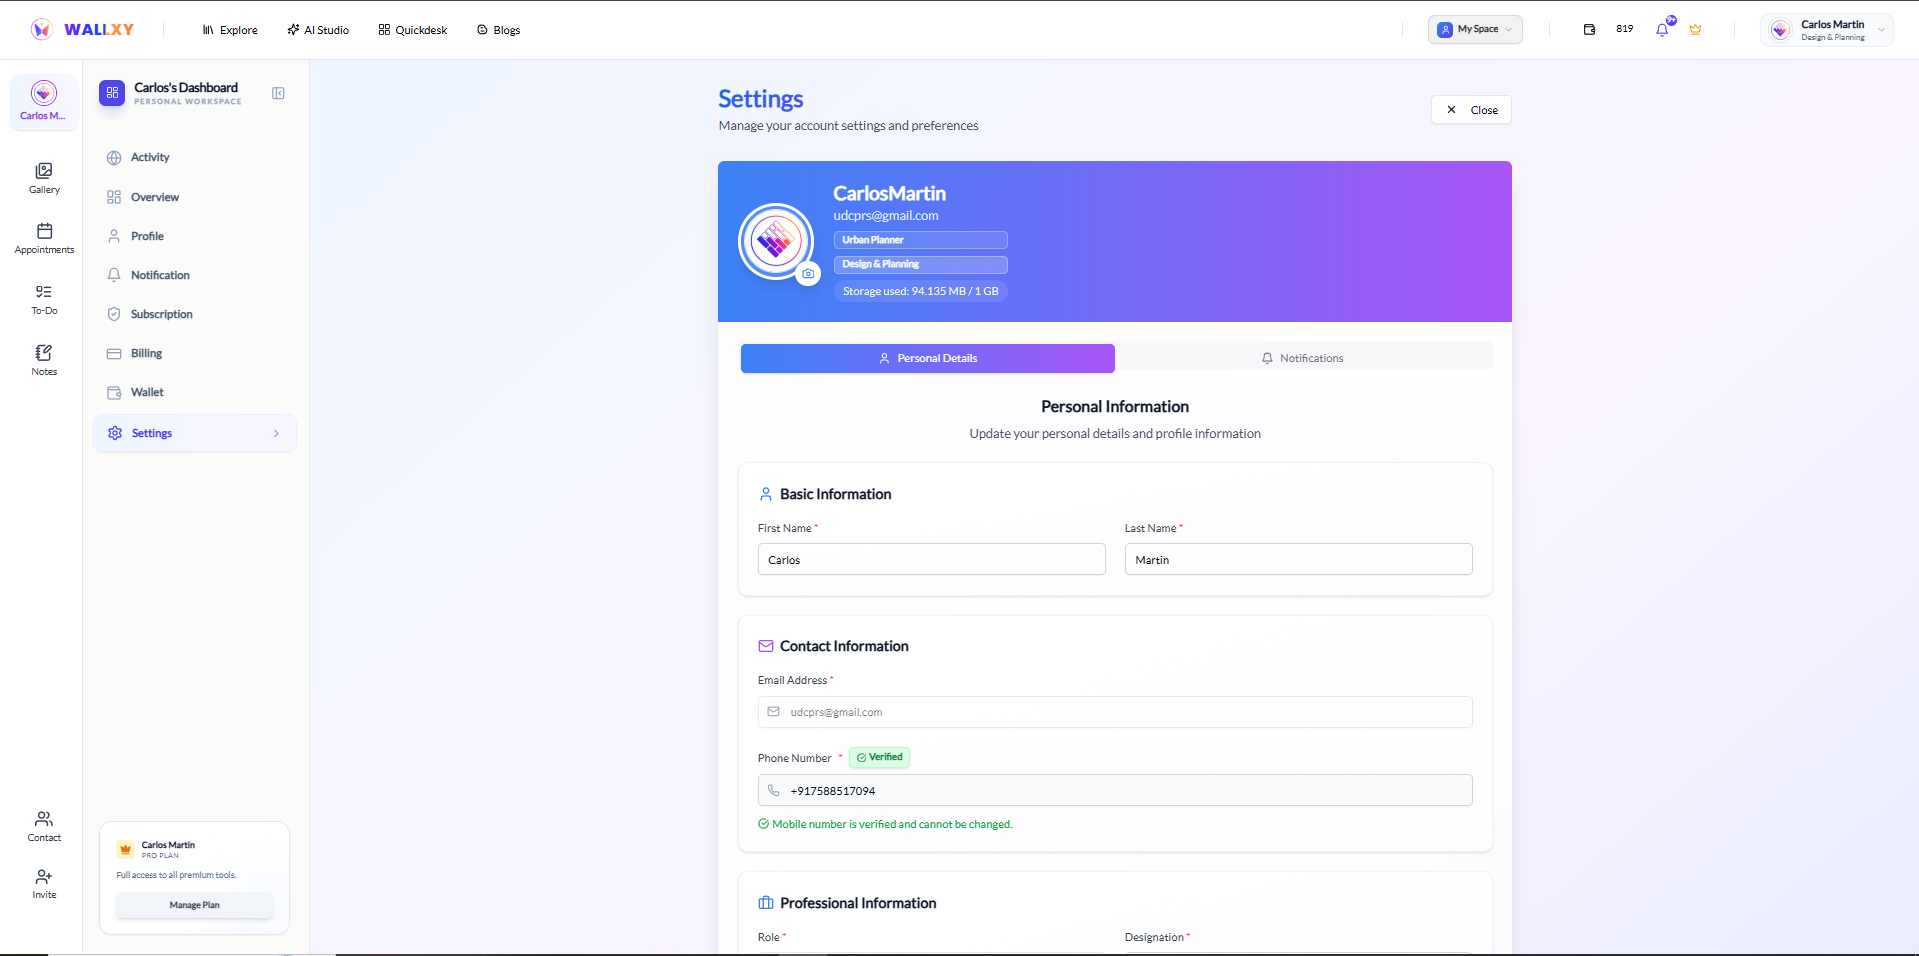
Go to the "My Profile" tab from the main menu. Click the edit icon to update your personal information, avatar, and bio.
Projects & File Management
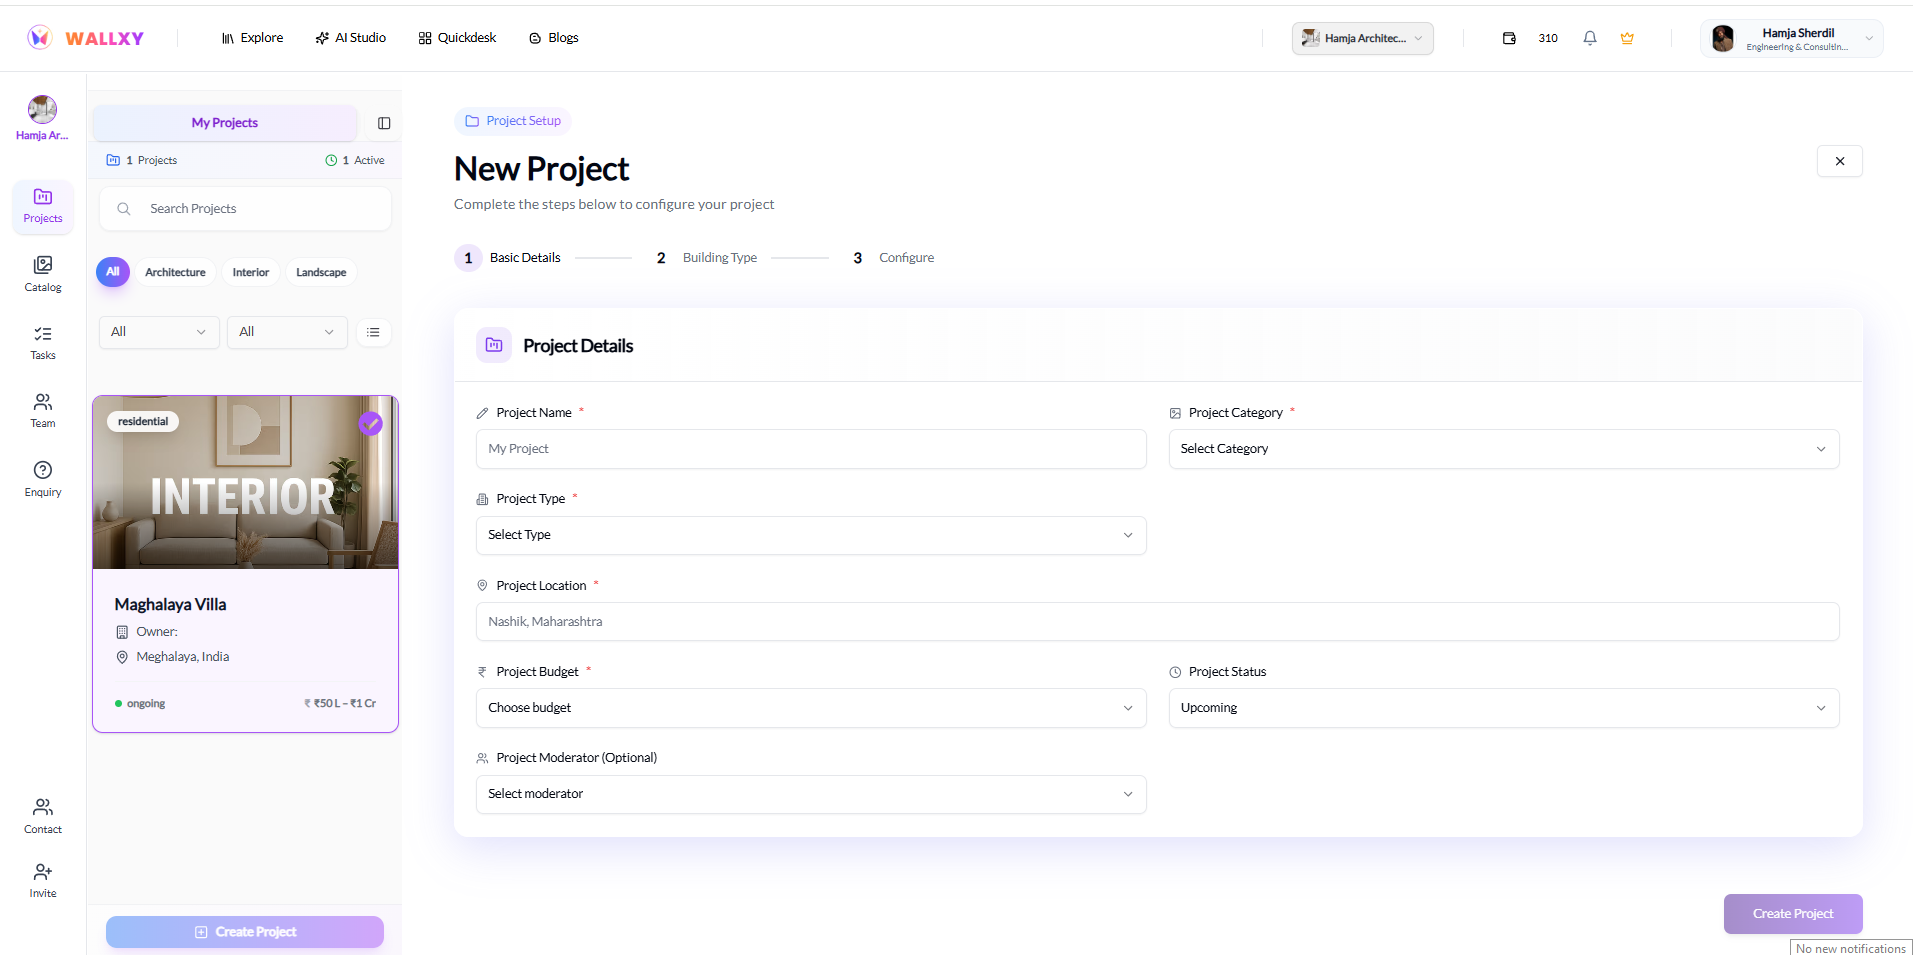
Go to your Dashboard or Company page and click "Create Project". You can add project details, upload a custom cover banner, and start uploading your drawings.
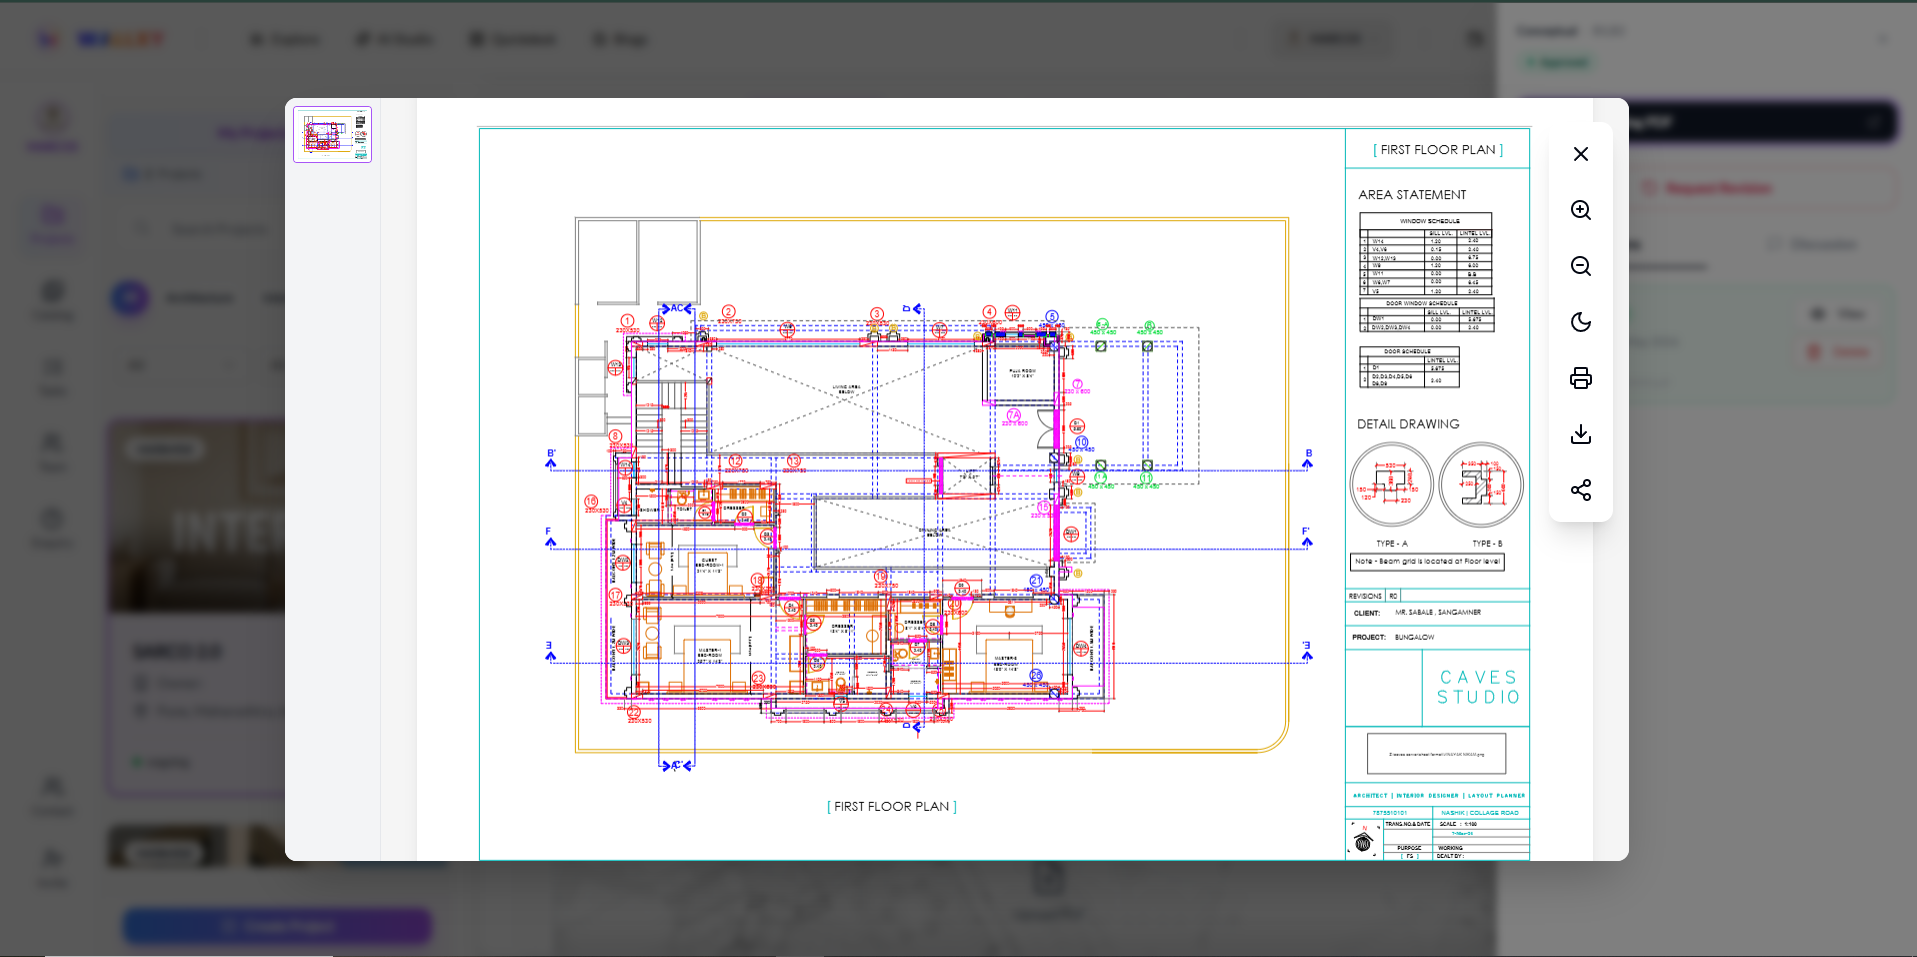
We support DWG, PDF, PNG, JPEG, and common 3D formats. PDFs and images render directly in our viewer, while DWG and other CAD files are securely stored for easy access.
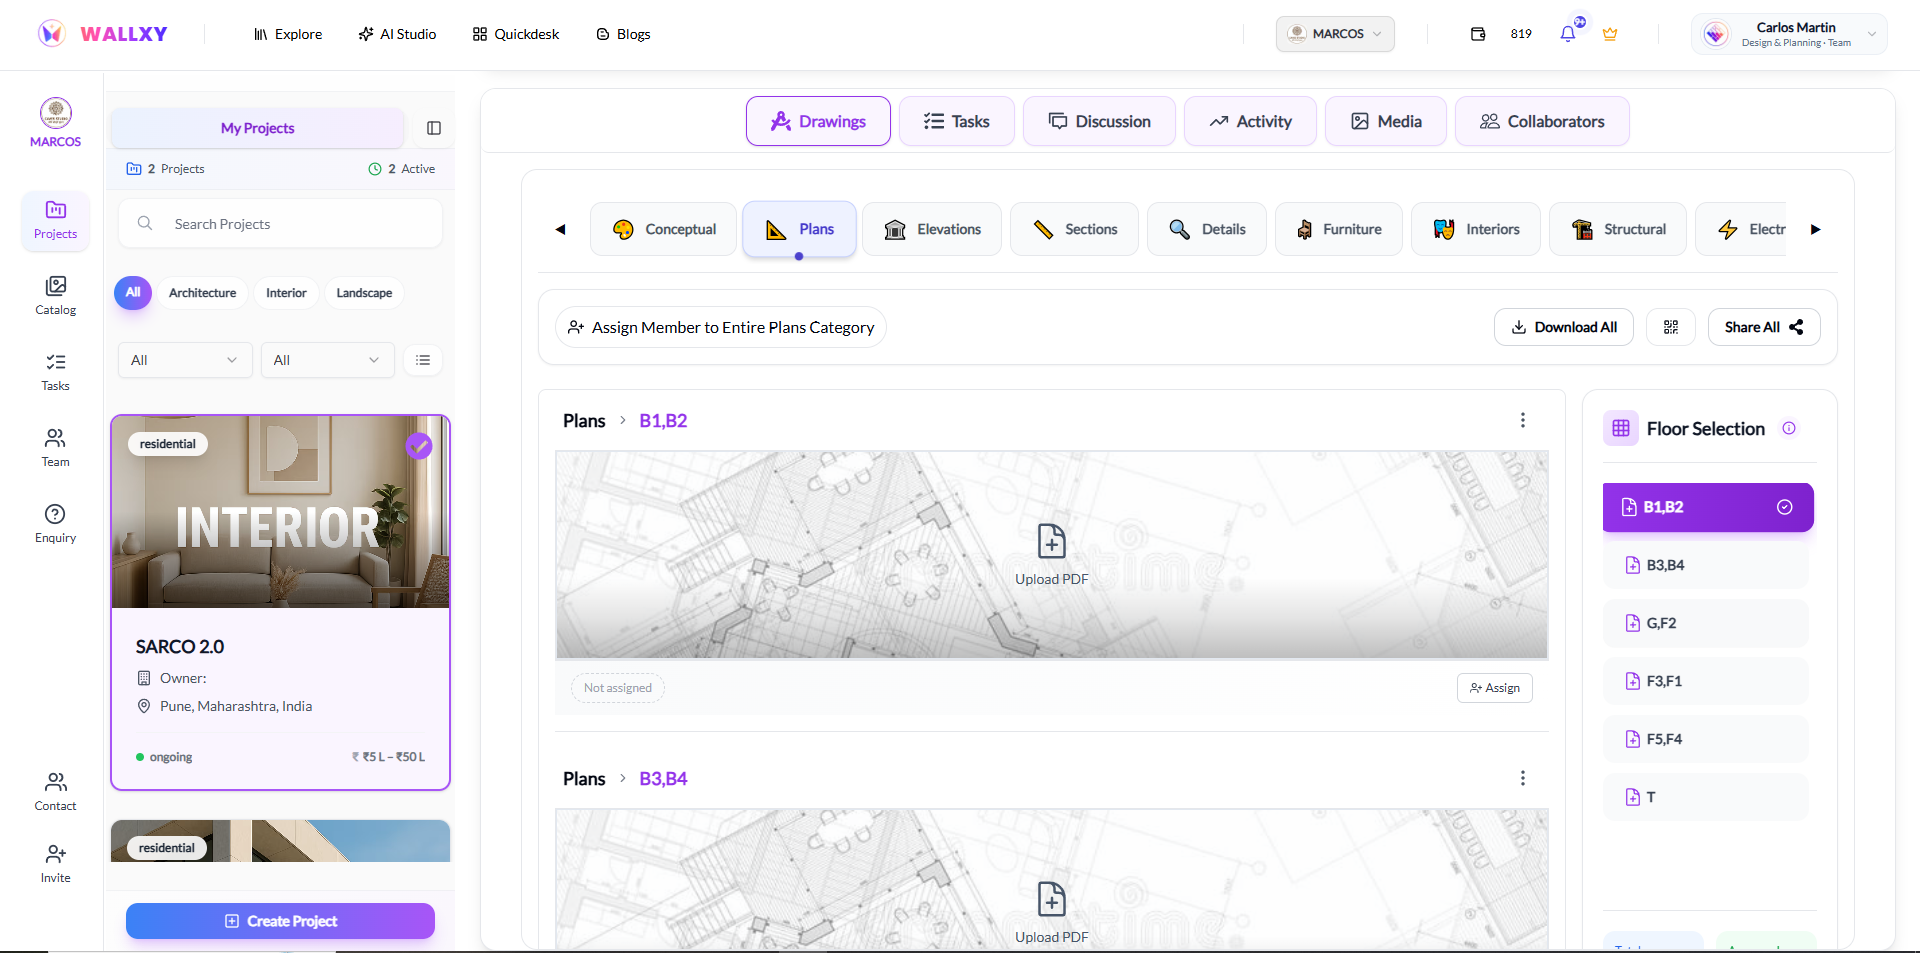
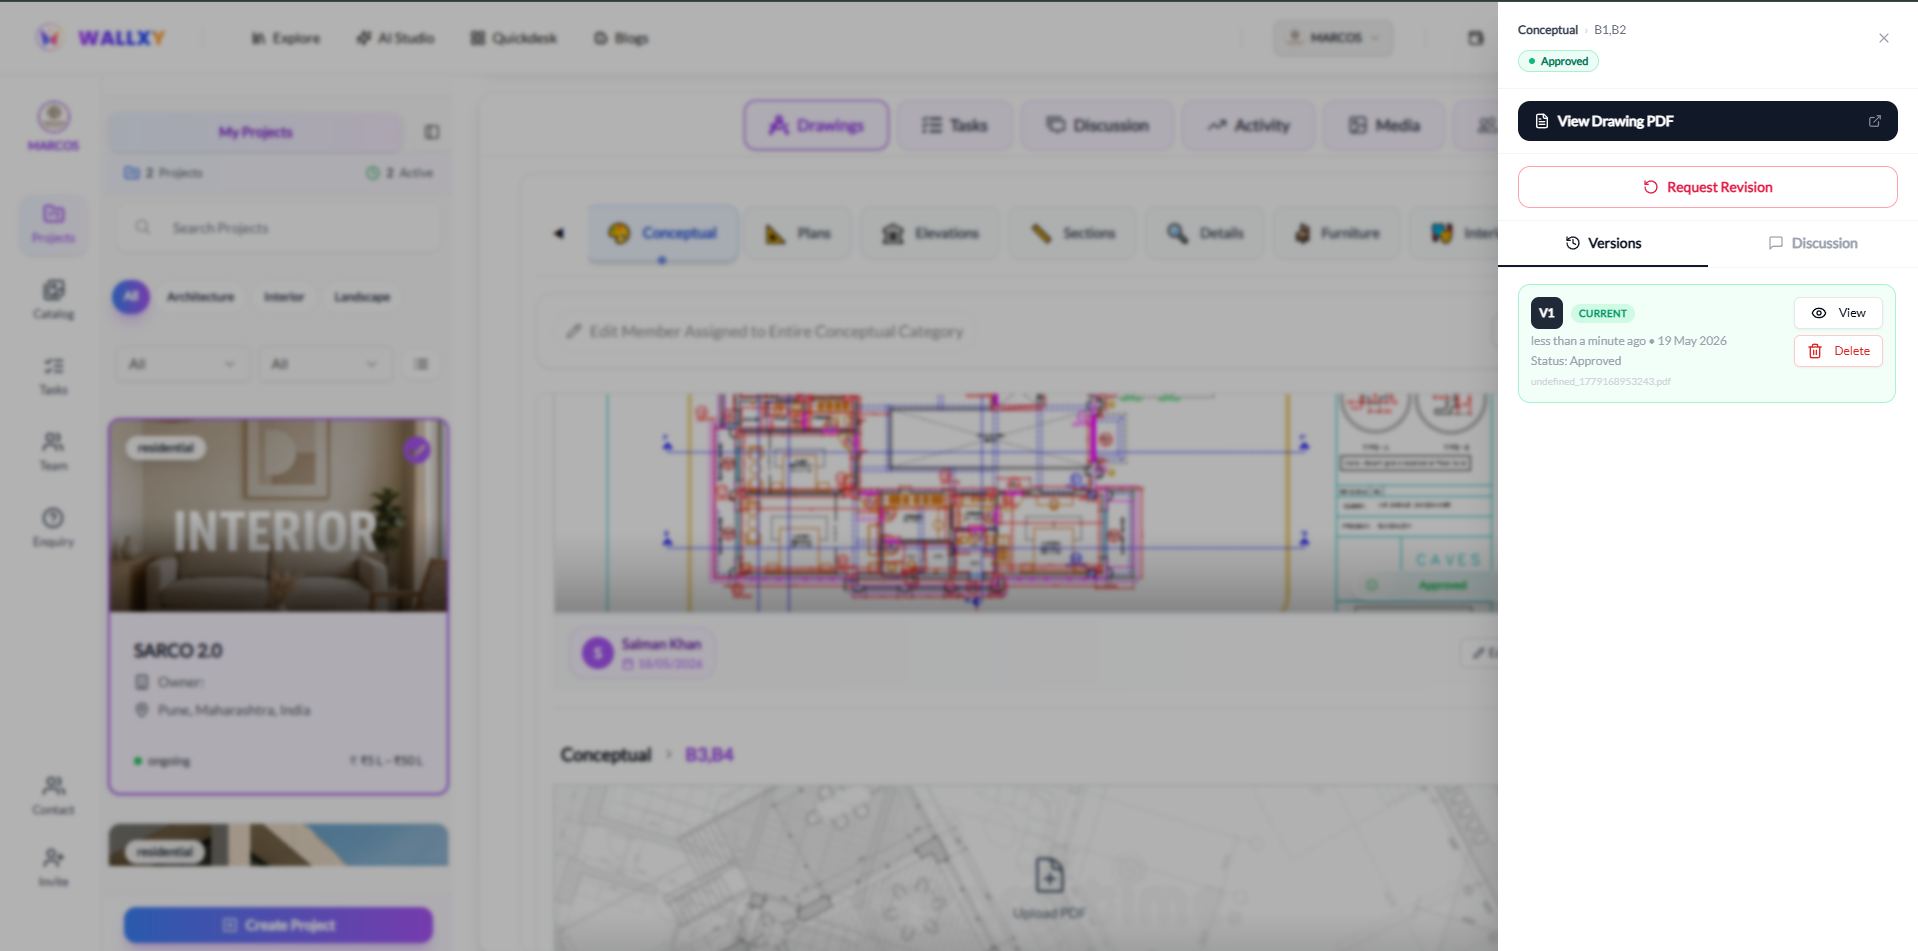
Wallxy makes it easy to keep all your project drawings organized and up to date. Follow these steps to upload drawings and manage their revisions: 1. Access Your Project: Go to your Dashboard or Company page and select your active project to open its drawings board. 2. Upload Drawings: Click the Upload button, or drag-and-drop your drawing files (PDF, DWG, PNG, JPEG) directly into the upload area. Wallxy automatically processes them for live vector viewing. 3. Upload a New Revision: To update an existing drawing, click on the drawing card, select Upload Revision (or New Version), and upload the updated file. Wallxy keeps your revision history organized so you never lose previous versions. 4. View & Share: Open any drawing to use the premium built-in CAD viewer, compare versions side-by-side, or generate a secure share link for your team and clients.
Yes. We follow strict industry best practices for security with end-to-end encryption. Your proprietary designs are yours and are never used to train external models.
Collaboration & Client Access
Absolutely. You can invite external collaborators with specific role permissions. Guests get view-only or restricted access so your master files remain protected.
Wallxy automatically adapts its interface based on the user's role to keep the experience clean and secure. 1. Internal Team View: Your team members (Admins, Moderators, Contributors) have access to full project management tools, drawing revisions, team task management, and private team discussions. 2. Client View (Project Owners): Clients see a simplified, polished interface focused strictly on viewing approved drawings, leaving comments, and monitoring daily progress. Internal team tasks, raw CAD files, and private workspace discussions are completely hidden.
Wallxy is purpose-built for the AEC industry. It includes drawing versioning, revision history tracking, live CAD/vector viewing, and team collaboration tailored specifically for architectural and construction workflows.
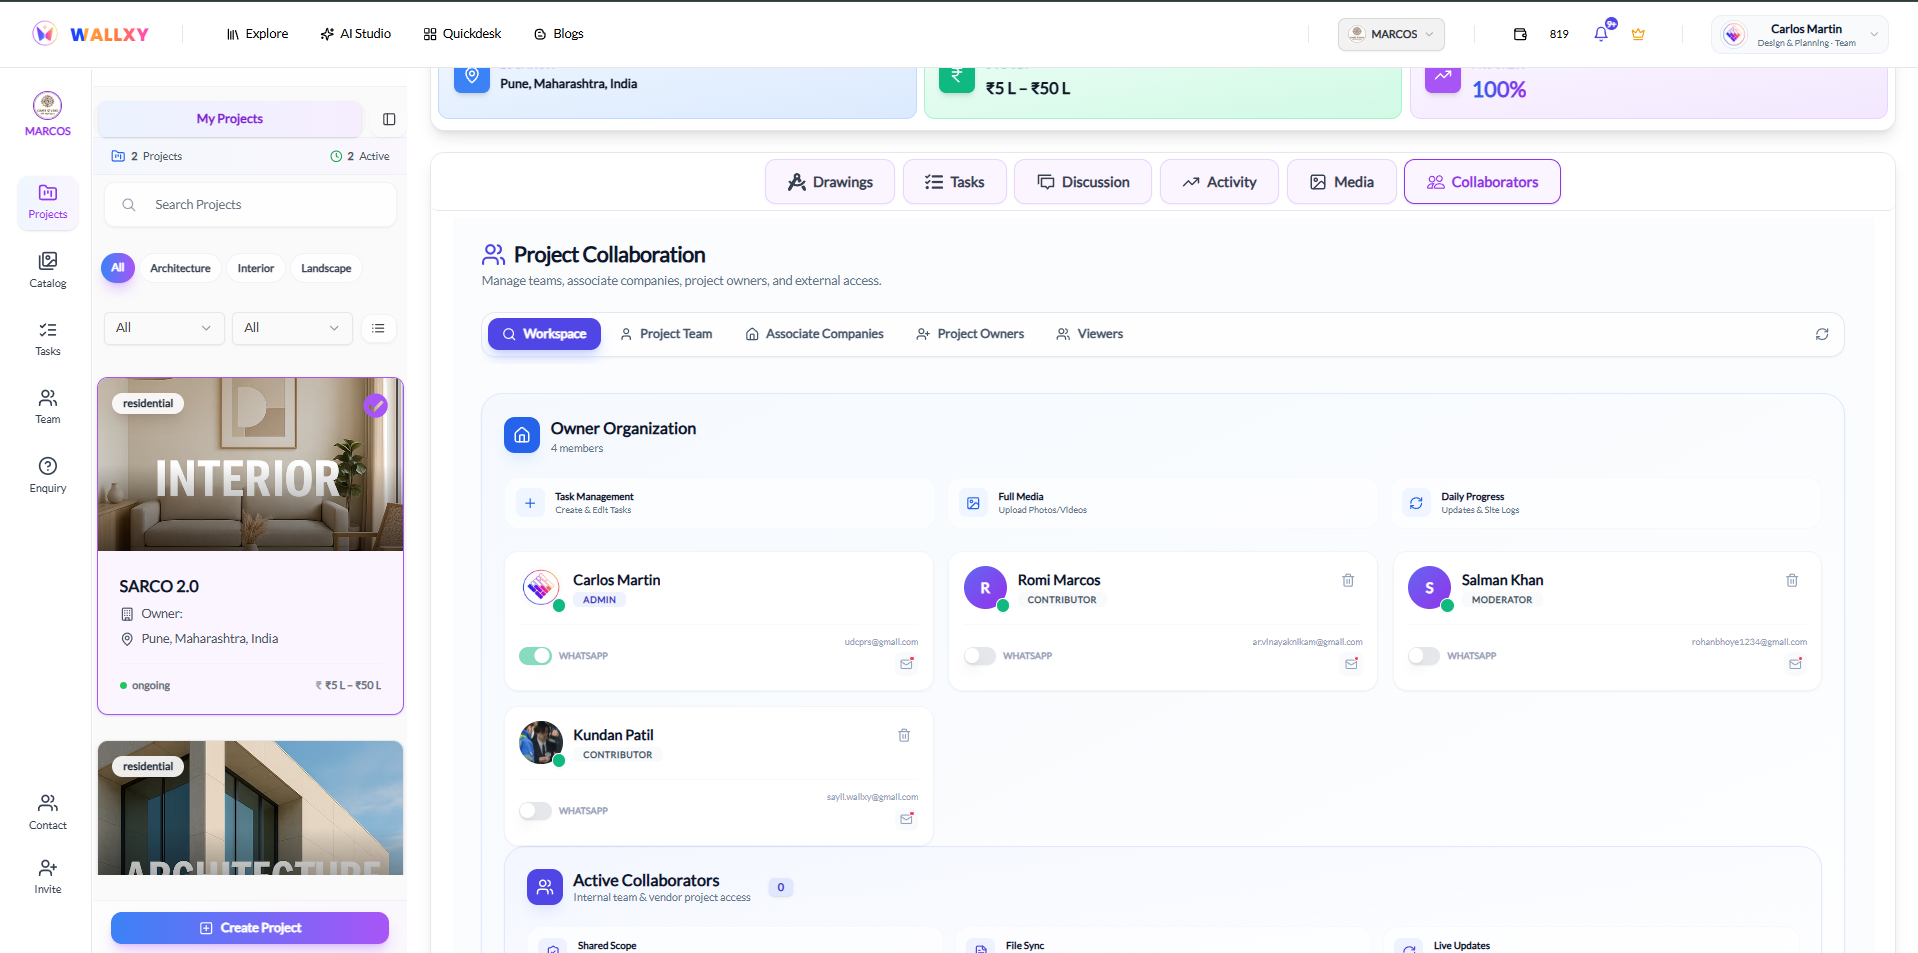
Wallxy offers granular role-based permissions to ensure your files remain secure. Follow these steps to manage access: 1. Open Project Collaborators: Open your project and click the Collaborators tab in the top navigation menu. 2. Navigate Role Categories: Use the sub-menu to manage different types of access: Workspace (core organization), Project Team (internal staff), Associate Companies (external vendors), Project Owners (clients), and Viewers (read-only access). 3. Assign Specific Roles: Inside the Workspace tab, you can see your organization members. Users are assigned specific roles like ADMIN (full access), MODERATOR, or CONTRIBUTOR to control their access to Task Management, Media, and Daily Progress.
Advanced Features & Billing
Wallxy allows you to generate QR codes for specific projects or drawings. Use the built-in QR scanner feature to instantly pull up the related files on your mobile device while on-site.
Navigate to the "Profile Dashboard" > "Subscription" tab to view our available plans and select the one that fits your needs.
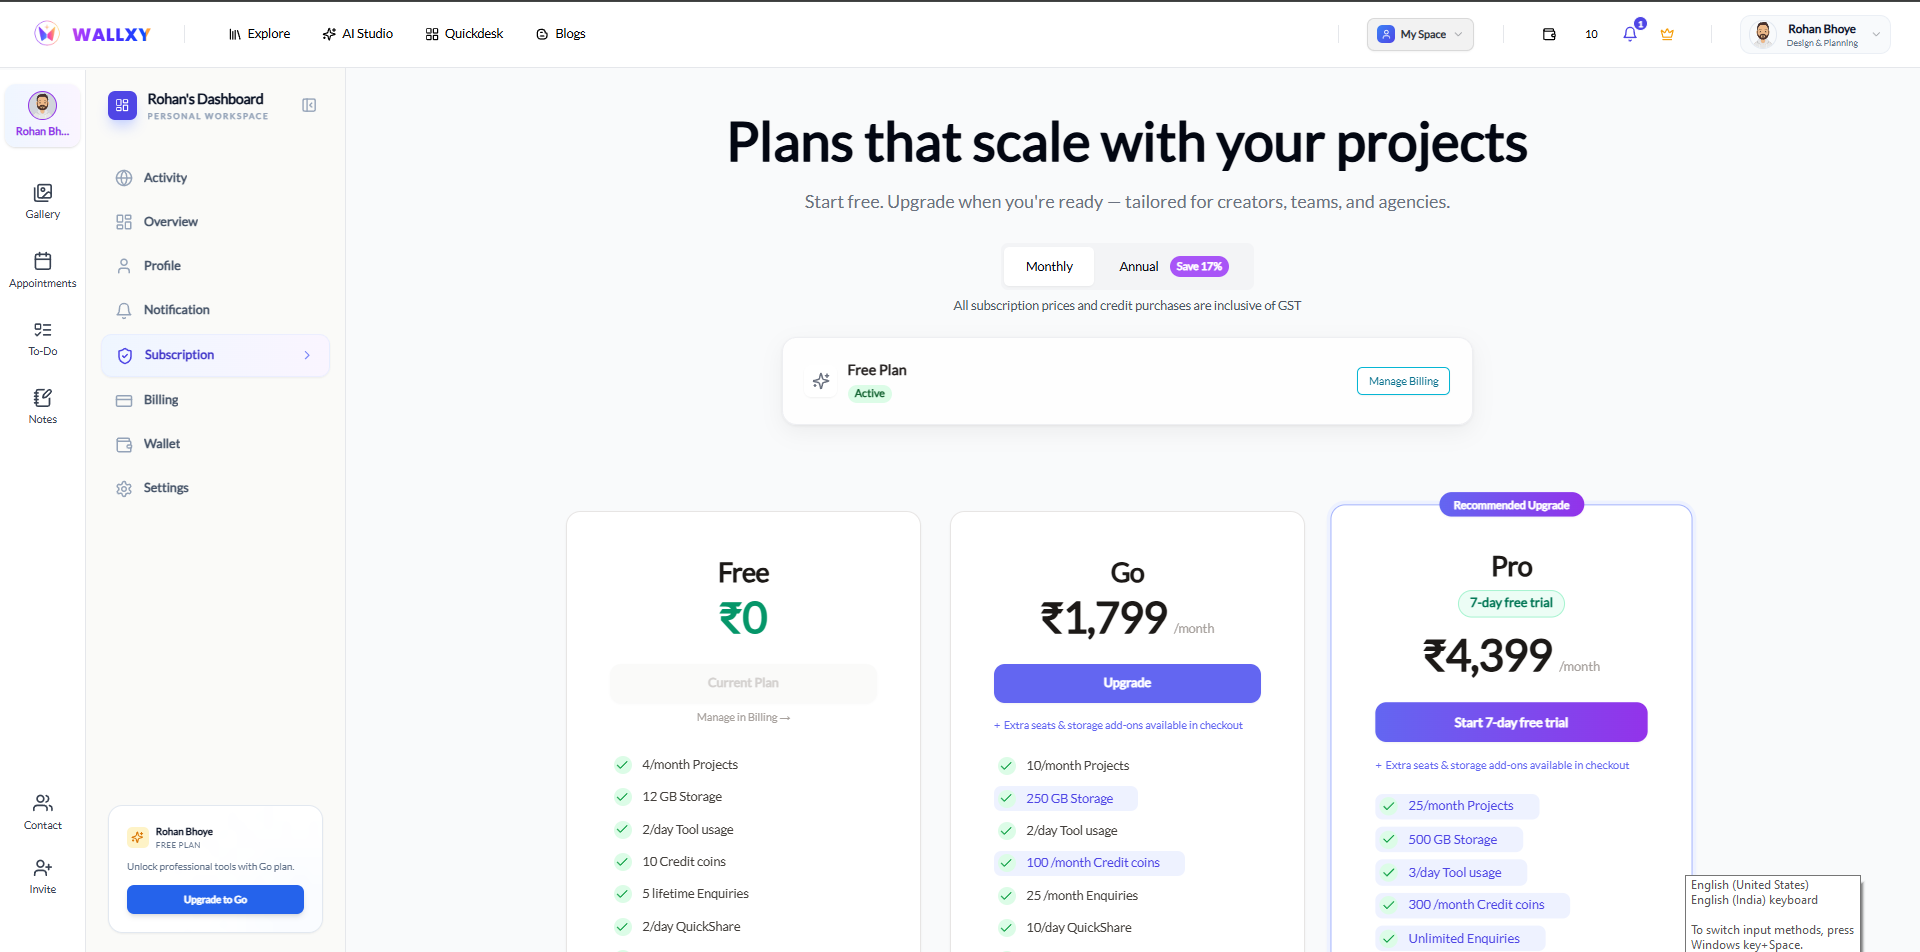
Your data remains safe. However, projects exceeding the free tier limits may be archived and become read-only until you upgrade again.
Still have questions?
We are here to help! Our specialized team is ready to assist you with any inquiries about the Wallxy platform.